Attaching and Removing
- Attaching the Microphone to the Camera
- Attaching the Wind Screen to the Microphone
- Removing the Microphone from the Camera
Attaching the Microphone to the Camera
-
Turn off the camera's power
-
Remove the shoe cover from the accessory shoe on the camera
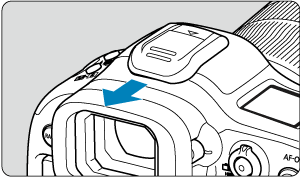
-
Remove the cover from the microphone
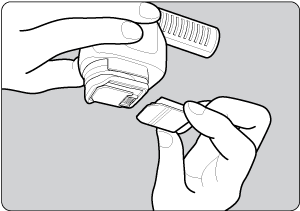
-
Attach the microphone to the accessory shoe on the camera

- Insert the mounting foot of the microphone until it clicks into the accessory shoe on the camera.
-
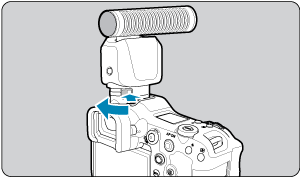
Secure the microphone
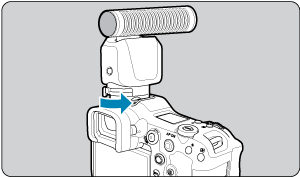
- Slide the mounting foot lock lever.
- Lock it so it clicks.
Caution
- Make sure the microphone is securely attached. Loose attachment may cause malfunctioning, and the microphone may fall off.
- Do not touch the contacts with your fingers. This may lead to corrosion. Corroded contacts may cause malfunctioning.
- Blow off any foreign material on the multi-function shoe with a commercially available blower or similar tool.
- Allow the multi-function shoe to dry before use if it gets wet.
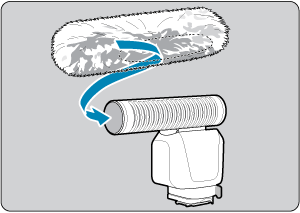
Attaching the Wind Screen to the Microphone
This has the effect of reducing noise from wind, etc.
Caution
- Do not pull on or wash the wind screen, as fibers can easily come out due to the material it is made from. A loss of fibers causes a reduction in the noise reduction effect of the wind screen.
- Do not use or store the wind screen in a high-temperature location, such as inside a car under the hot sun. Doing so will cause the base material to harden and the fibers to wither.
- Take care to ensure that fibers that come out of the wind screen do not enter the camera.
Removing the Microphone from the Camera
-
Turn off the camera's power
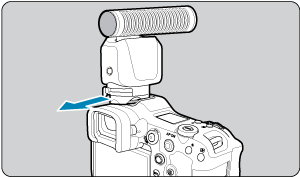
-
Release the lock
- While pressing the lock-release button, slide the lock lever.
-
Remove the microphone from the camera
- Put the cover on the microphone's contacts to protect the contacts.