A+: Assist Features
Selecting  Assist Features
-
Select [
 : Assist].
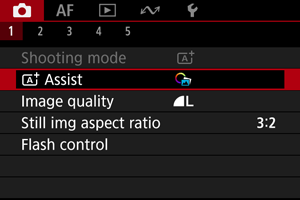
-
Select an option.
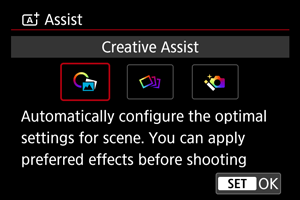
Creative Assist
You can shoot with your preferred effects applied.
-
Press the
 button.
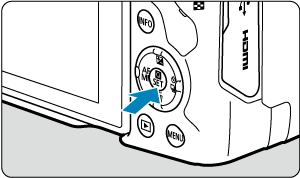

- Read the message and select [OK].
-
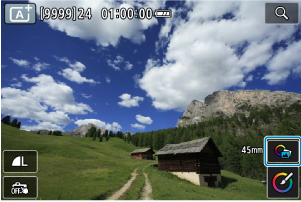
Select an effect.
- Use the
 dial to select an effect, then press the button.
- Use the
-
Select the effect level and other details.
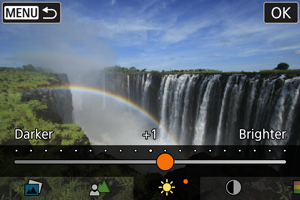
- Set with the dial, then press the button.
- To reset the setting, press the
 button, then select [OK].
- Set with the
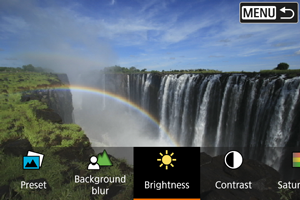
Creative Assist effects
-
[
 ] Preset
Select one of the preset effects.
Note that [Saturation], [Color tone 1], and [Color tone 2] are not available with [B&W].
-
[
 ] Background blur
Adjust background blur. Choose higher values to make backgrounds sharper. To blur the background, choose lower values. [Auto] adjusts background blurring to match the brightness. Depending on lens brightness (f/number), some positions may not be available.
-
[
 ] Brightness
Adjust image brightness.
-
[
 ] Contrast
Adjust contrast.
-
[
 ] Saturation
Adjust the vividness of colors.
-
[
 ] Color tone 1
Adjust amber/blue color tone.
-
[
] Color tone 2
Adjust green/magenta color tone.
-
[
 ] Monochrome
Set the toning effect for monochrome shooting.
Note
- [Background blur] is not available in flash photography.
- These settings are reset when you switch shooting modes or set the power switch to
 . To save the settings, set [: Retain Creative Assist data] to [Enable].
Saving effects
To save the current setting to the camera, tap [![]()
![]() Register] on the [Creative Assist] setting screen, then select [OK]. Up to three presets can be saved as [USER*]. After three have been saved, an existing [USER*] preset must be overwritten to save a new one.
Register] on the [Creative Assist] setting screen, then select [OK]. Up to three presets can be saved as [USER*]. After three have been saved, an existing [USER*] preset must be overwritten to save a new one.
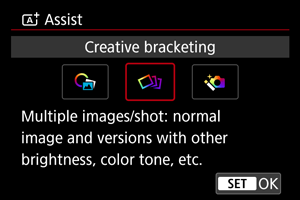
Creative Bracketing
Multiple images are captured per shot besides the normal image, each with characteristics such as brightness and color tone automatically changed.
-
Select [
: Assist].
-
Select [Creative bracketing].
Caution
- Continuous shooting is not available.
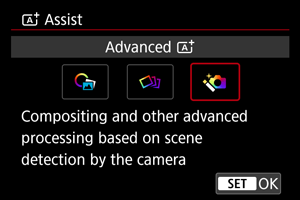
Advanced
Compositing and other advanced processing is applied to your shots based on scene detection by the camera.
-
Select [
: Assist].
-
Select [Advanced
].
-
Check the icon.
Caution
- Continuous shooting is not available.
- The camera shoots in [Electronic] shutter mode.
- The image area is smaller than in other shooting modes.
- RAW image quality cannot be set.
- Flash photography is not available.
- Images that are greatly out of alignment due to camera shake or other issues may not be aligned correctly.
- To prevent camera shake, the camera may set a high ISO speed.
- Note that the image may not be rendered with a smooth gradation and may look uneven or noisy.
- The image processing may not be sufficient in scenes with strong backlighting or high contrast.
- Shooting moving subjects may result in afterimages from the movement, or darkness around the subject.
- Images may not be aligned correctly if they are patterned (with a lattice or stripes, for example), are generally flat and uniform, or are greatly out of alignment due to camera shake or other issues.
- Be careful about camera shake in handheld shots.
- Shooting under fluorescent or LED lighting may cause issues such as irregular exposure or colors in the resulting images, due to the flickering light source.
- [BUSY] appears on the screen as images are processed, and shooting is not possible until processing is finished.
- Shots will look slightly different from the preview image shown on the screen.
- AF point display information is not added to images in some scenes. ()