Displaying the Connection Wizard
This section describes how to add connection settings by following the connection wizard.
If an error is displayed, see Troubleshooting and check the settings.
- Pressing the shutter button or other camera controls during configuration using the connection wizard will close the connection wizard. Do not press the shutter button or other controls until configuration is finished.
- [
 : WFT settings] is only available when [
 : Multiple exposure] is set to [Disable].
-
Press the
 button on the camera.
 -
Select [
: WFT settings].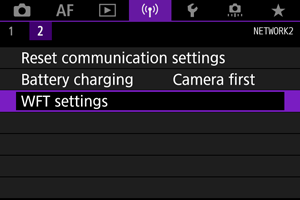
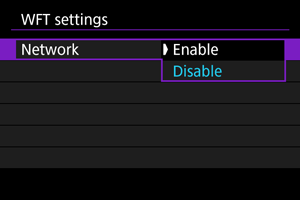
-
Select [Enable].
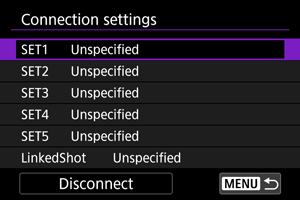
-
Select [Connection settings].

-
Select [SET*].
-
Select [Create with wizard].
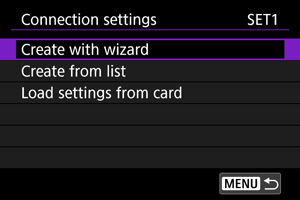
- If the camera has multiple registered communication settings and function settings, you can add connection settings by selecting [Create from list] and combining registered settings.
- You can also add connection settings by using connection settings stored on the card. Configure the settings by selecting [Load settings from card] ().
-
Select the setting method.
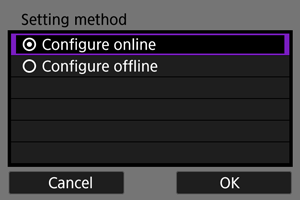
- Select an item and select [OK] to go to the next screen.
- Select [Configure online] to configure connection settings and then join the network.
- Select [Configure offline] to configure [FTP trans.] connection settings without connecting.
-
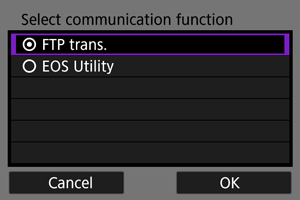
Select the communication function.
For [Configure online]
For [Configure offline]
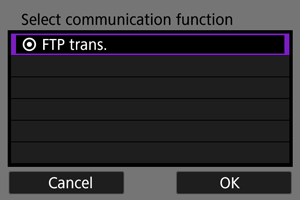
- Select the communication function by referring to Preparation.
- Select an item and select [OK] to go to the next screen.
-
Select [Wireless
].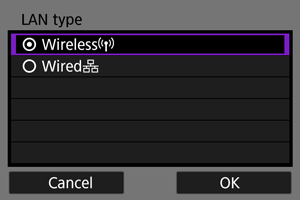
- Select [OK] to proceed to the next screen.
- If you selected [Wired
 ], go to Setting the IP Address.
-
Select [New settings].
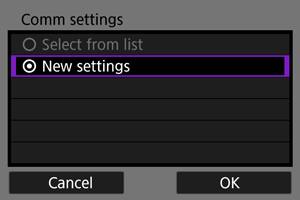
- Select [OK] to proceed to the next screen.
- If the camera has registered communication settings, you can apply the registered settings by selecting [Select from list].
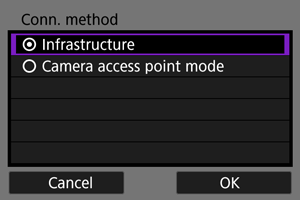
For [Configure online]

- To connect a device via an access point, go to Checking the Type of Access Point.
- To directly connect a device to the camera, go to Connecting in Camera Access Point Mode.
For [Configure offline]
- To connect a device via an access point, go to Connecting Using an Infrastructure.
- To directly connect a device to the camera, go to Connecting in Camera Access Point Mode.