Configuring FTP Server Connection Settings
These instructions are continued from Configuring Settings for the Communication Function.
-
Select an FTP mode.
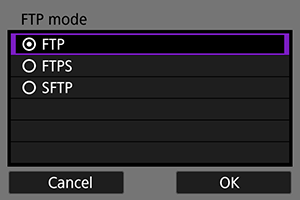
- To perform a secure FTP transfer using a root certificate, select [FTPS]. For root certificate settings, see Importing a Root Certificate for FTPS.
- To perform a secure FTP transfer using an SSH connection, select [SFTP]. Configure the login settings to be used in step 5.
- Select [OK] to proceed to the next screen.
-
Select [Address setting].
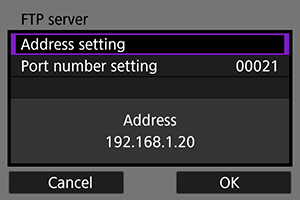
- Select [OK] to proceed to the next screen.
- If you have set the IP address setting to [Auto setting] or the DNS address setting to [Manual setting], the virtual keyboard is displayed.
- If you have set the DNS address setting to [Disable], the number entry screen is displayed.
-
Enter the FTP server's IP address.
When Using the Virtual Keyboard
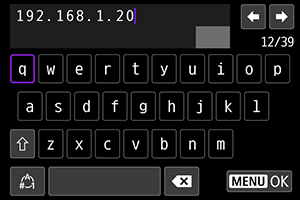
- Enter the IP address with the virtual keyboard (). If DNS is used, enter the domain name.
- To set the entered values and return to the screen in step 2, press the
button.
When Using the Number Entry Screen
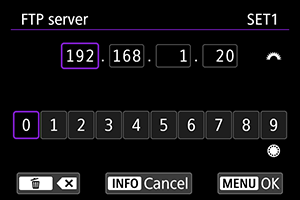
- Use
to select the input position in the upper area and use
to select a number. Press
to enter the selected number.
- To set the entered values and return to the screen in step 2, press the
button.
-
Set the port number.
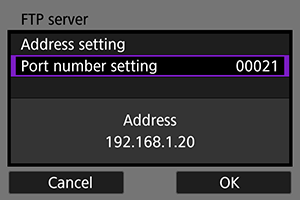
- [Port number setting] is usually 00021 (FTP/FTPS) or 00022 (SFTP).
- Select [OK] to proceed to the next screen.
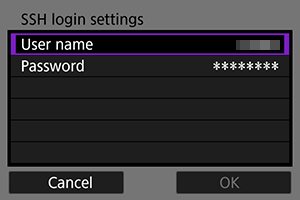
- If you selected [FTP] or [FTPS] in step 1, go to step 6. If you selected [SFTP], go to step 5.
-
Configure the SSH login authentication settings.
-
Set the passive mode.
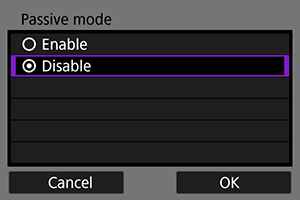
- This is not displayed if you selected [SFTP] in step 1.
- Select [OK] to proceed to the next screen.
- If "Error 41: Cannot connect to FTP server" is displayed in step 9, setting [Passive mode] to [Enable] may resolve the error.
-
Set the proxy server.
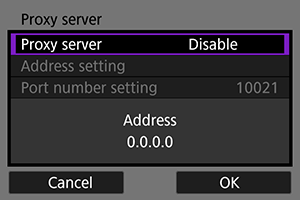
- This is not displayed if you selected [FTPS] or [SFTP] in step 1.
- Select [OK] to proceed to the next screen.
-
Set the login method.
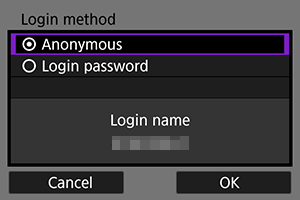
- This is not displayed if you selected [SFTP] in step 1.
- Select [OK] to proceed to the next screen.
-
Set the target folder.
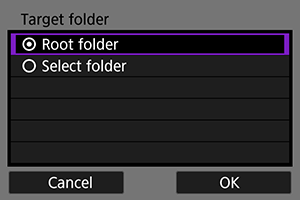
- Select [Root folder] to have images saved in the root folder as specified in the FTP server settings ().
- Select [Select folder] to specify a target folder in the root folder. If no folder exists, a folder will be created automatically.
- Select [OK] to proceed to the next screen.
- The
lamp on the camera will light in green.
-
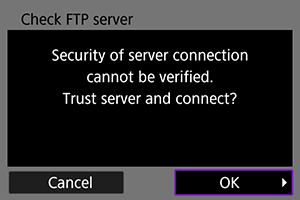
When the following screen is displayed, select [OK] to trust the destination server.
-
Select [OK].
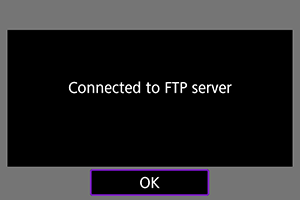
- This is not displayed for offline settings.
-
Select [OK].
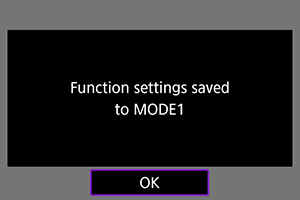
-
Select [OK].
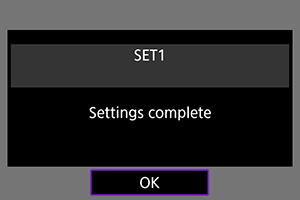
- The [Network settings] screen will reappear.
- Settings information is stored in the camera. It is not stored in the transmitter.
The connection settings for FTP transfer are now complete.
During image transfer, the lamp on the transmitter blinks in green.
Importing a Root Certificate for FTPS
If the FTP mode is set to [FTPS] when configuring the connection settings, the root certificate corresponding to the FTPS server to connect to must be imported to the camera.
- Only a root certificate whose file name is "ROOT.CER", "ROOT.CRT", or "ROOT.PEM" can be imported to the camera.
- Only one root certificate file can be imported to the camera. Insert a card containing the root certificate file in advance.
- The card from which a certificate can be imported is the card preferentially specified in [
: Record func+card/folder sel.]'s [Record/play] or [Playback] settings.
- The connected server may not be trustworthy if an FTPS connection is established by using a self-signed certificate.
-
Select [
: Network settings].
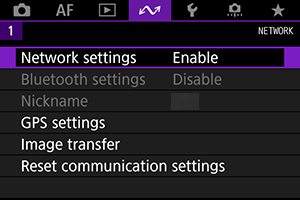
-
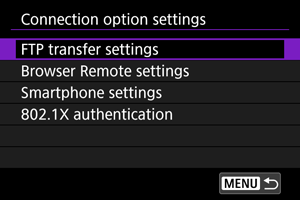
Select [Connection option settings].
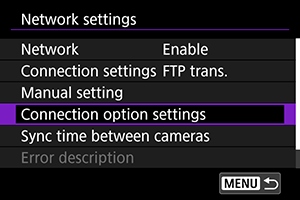
-
Select [FTP transfer settings].
-
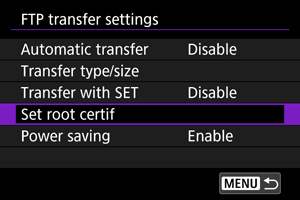
Select [Set root certif].
-
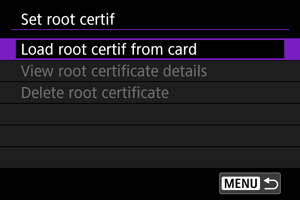
Select [Load root certif from card].
-
Select [OK].
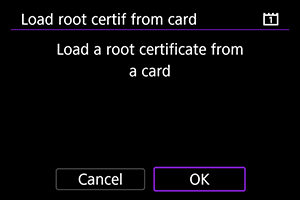
- The root certificate is imported.
- Select [OK] on the confirmation dialog to return to the [Set root certif] screen.
Note
- Select [Delete root certificate] on the screen in step 5 to delete the root certificate imported to the camera. Select [View root certificate details] to check the issuer, subject, validity period, and other information.