Automatsko aktiviranje s dvije grupe prijemnih jedinica
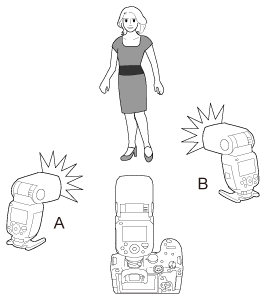
Prijemne jedinice mogu se podijeliti u aktivne grupe A i B i možete podesiti balans osvjetljenja (omjer bljeskalica) između njih.
Ekspozicija se regulira automatski kako bi kombinirano svjetlo grupe osiguralo standardnu ekspoziciju.
-
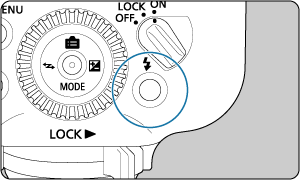
Pritisnite joystick u sredini.

- Dovršite ove postavke na svakoj prijemnoj jedinici.
-
Podesite aktivnu grupu prijemnih jedinica u (1).
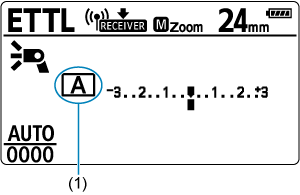
- Odaberite
 ili
ili  za aktivnu grupu.
 - Podesite jednu prijemnu jedinicu na , a drugu na .
- Odaberite
-
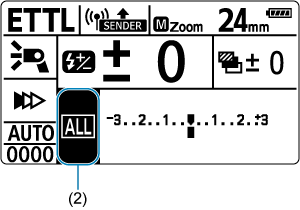
Podesite aktivnu grupu predajne jedinice u (2).
- Izvršite korake 3 – 5 na predajnoj jedinici.
- Pritisnite joystick okomito ili vodoravno ili okrenite
 za odabir opcije, zatim pritisnite joystick u sredini.
-
Podesite na
 .
.
- Pritisnite joystick vodoravno ili okrenite za odabir , zatim pritisnite joystick u sredini.
- Pritisnite joystick vodoravno ili okrenite
-
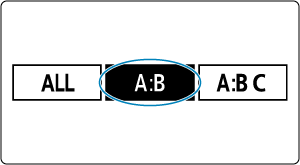
Podesite raspon bljeska A:B.

- Pritisnite joystick u sredini kako biste odabrali stavku prikazanu na slici.
- Pritisnite joystick vodoravno ili okrenite za podešavanje raspona bljeska A:B, zatim pritisnite joystick u sredini.
-
Provjerite vezu te jesu li bljeskalice napunjene.
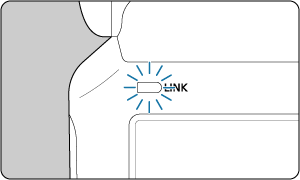
- Provjerite svijetli li žaruljica
 zeleno.
- Provjerite svijetle li žaruljice spremne bljeskalice predajne i prijemne jedinice.
- Ako je opcija P.Fn-05 podešena na [0] (), predajna bljeskalica oglasi se zvučnim signalom kad se sve Speedlite bljeskalice napune.
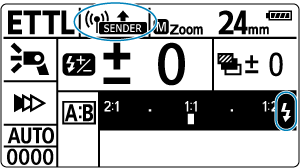
- Provjerite da na LCD pokazivaču predajne jedinice nije li prikazano
 .
. - Provjerite prikazuje li se ikona
 koja označava završetak punjenja predajne/prijemne jedinice na LCD pokazivaču predajne jedinice (
 se ne prikazuje).
 - Za detalje o osvjetljenju LCD pokazivača predajne jedinice pogledajte Osvjetljenje LCD pokazivača.
- Provjerite svijetli li žaruljica
-
Snimajte.
- Prijemne jedinice aktiviraju se pri podešenom rasponju bljeska.