Attaching to the Camera
Set the camera's power switch to ![]() before attaching the transmitter.
before attaching the transmitter.
-
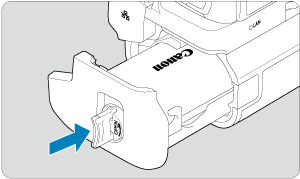
Remove the contact covers.
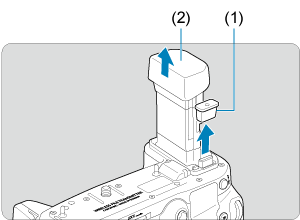
- Remove transmitter contact covers (1) and (2).
- Attach transmitter contact covers (1) to (2) to store them.
-
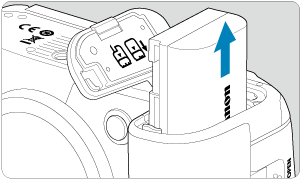
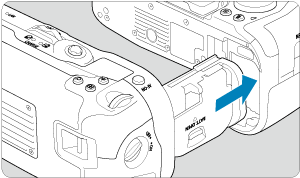
Remove the battery from the camera.
-
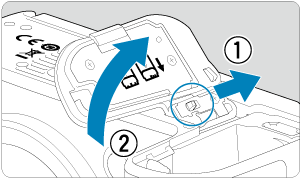
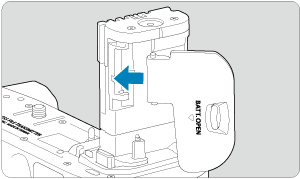
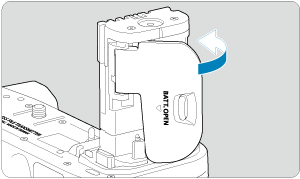
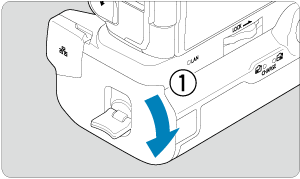
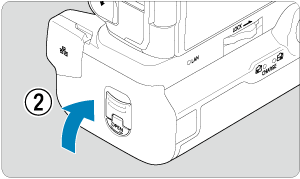
Remove the battery compartment cover from the camera.
-
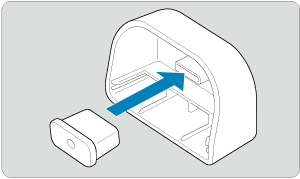
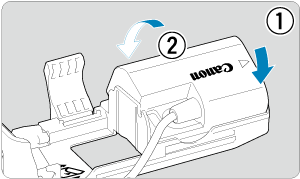
Attach the battery compartment cover to the holder.
- Insert the hinge ends of the battery compartment cover in the holder.
- Press the battery compartment cover to secure it.

- To remove the battery compartment cover, slide the lever of the battery compartment cover to release it, and then follow the attachment procedure in reverse.
-
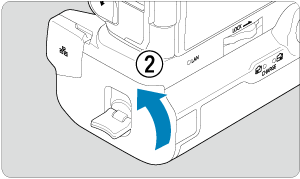
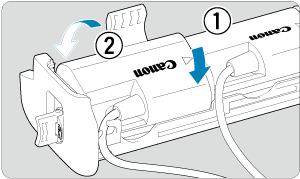
Secure the transmitter.
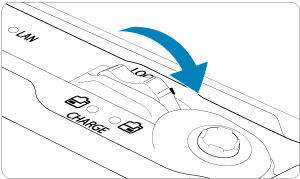
- Insert the transmitter in the camera and turn the release dial to lock the transmitter in place.
-
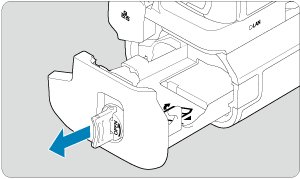
Remove the battery magazine.

Caution
- When reattaching the battery compartment cover to the camera, attach it opened to at least 90°.
- Do not touch the camera or transmitter contacts.
Caution
-
Using an External Microphone During Movie Shooting
- If wireless functions are in use, noise may be recorded regardless of the use of the built-in microphone or an external microphone. It is recommended that you do not use wireless functions when shooting movies.
Attaching Batteries
-
Attach the batteries.
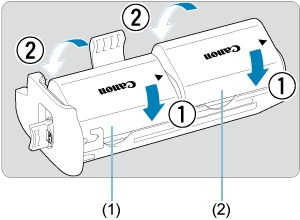
(1) Battery for the transmitter
(2) Battery for the camera
- The camera and transmitter cannot be used together unless two batteries are inserted.
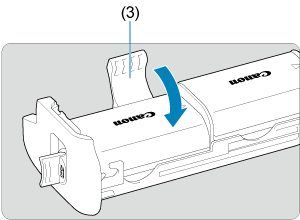
(3) Battery holder
- Press (3) until it clicks into place.

(4) Battery release lever
- To remove the batteries, release (3) and pull (4) in the direction of the arrow.
Caution
- When only one battery is used, inserting it on the camera side will power only the camera. Inserting it on the transmitter side will not power the camera or the transmitter.
-
Attach the battery magazine.
- Insert the battery magazine all the way in to secure it.
Caution
- When attaching batteries, make sure the electrical contacts are clean. Wipe off any dirt on the contacts with a soft cloth.
- Attach the batteries after attaching the transmitter to the camera. If the transmitter is attached to the camera with batteries already attached, it may prevent correct display of battery check results.
- Before removing the transmitter, turn the camera off and remove the batteries.
- Reattach the protective covers for the camera and transmitter contacts after removing the transmitter. If the transmitter will not be used for some time, remove the batteries.
- If a battery communication error message is displayed when the transmitter is attached, follow the instructions in the message. If the camera loses power, reinstall the battery magazine and restart the camera.
Using a Household Power Outlet
-
Attach the DC coupler.
- Attach DC Coupler DR-E6 (sold separately) the same way as the batteries.
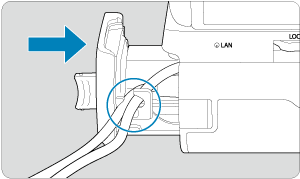
- Pass the DC coupler cord through the battery magazine cord groove.
- Insert the battery magazine all the way in to secure it.
Note
- The DC coupler can be used in conjunction with a battery.
- When only one DC coupler is used, inserting it on the camera side will power only the camera. Inserting it on the transmitter side will not power the camera or the transmitter.
-
Attach the battery magazine.
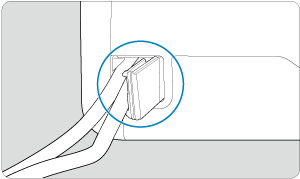
- Guide the end of the cord out of the cord hole.
-
Connect the DC coupler to the AC adapter.
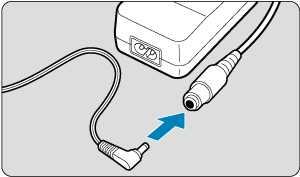
- Securely connect the DC coupler's plug to the socket of AC Adapter AC-E6N (sold separately).
-
Connect the power cord.
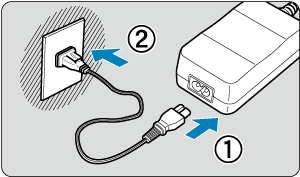
- Connect the power cord to the AC power adapter and insert the power plug into a power outlet.
Caution
- While the camera is on, do not connect or disconnect the power cord or connector, and do not remove the battery magazine.
- Avoid getting the DC coupler cord caught between the transmitter and battery magazine.
Button and Dial Operations
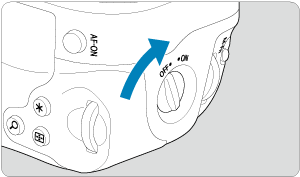
- To use the buttons and dials, turn the vertical-grip on/off switch (4) to ON.
- The buttons and dials are used the same way as corresponding buttons and dials on the camera.

- (1) Shutter button
- (2)
 Multi-function button
 - (3)
 Main dial
 - (4) Vertical-grip On/Off switch
- (5)
 Multi-controller
- (6)
 Magnify/Reduce button
 - (7)
 AF point selection button
 - (8)
 AE lock/FE lock button
 - (9)
 AF start button
 - (10)
 Quick control dial 2