Correcting Clips
- Export Format
- Cropping
- Lens Mask
- Parallax Correction
- Automatic Horizontal Correction
- Manual Horizontal Correction
- Image Stabilization
Perform clip correction without [Fisheye View] selected on the [VR Correction] panel.

Results of correction are applied to exported files.
Caution
- Peripheral image areas may be missing if clips recorded with the camera tilted are corrected with parallax correction, manual or automatic horizontal correction, or image stabilization.
Export Format
Select a format for exported clips.
When set to [2D]
[![]() ]: Select when exporting for 180°VR content. This option is available under the following conditions.
]: Select when exporting for 180°VR content. This option is available under the following conditions.
- Clips captured using RF7-14mm F2.8-3.5 L FISHEYE STM
When set to [3D]
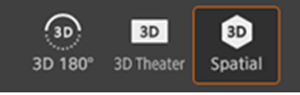
[![]() ]: Select when exporting for 180°VR content.
]: Select when exporting for 180°VR content.
[![]() ]: Select when exporting for display in theater format.
]: Select when exporting for display in theater format.
[![]() ]: Select when exporting in a theater format such as 3D side-by-side or for content such as spatial video or spatial photos. This option is available under the following conditions.
]: Select when exporting in a theater format such as 3D side-by-side or for content such as spatial video or spatial photos. This option is available under the following conditions.
- Mac computer with Apple silicon that has macOS 14.4 or later installed
Cropping
You can select the aspect ratio for cropping clips when [Export Format] is set to [![]() ] or [
] or [![]() ].
].
Lens Mask
You can make the appearance of the lens on the other side, as captured in clips, less noticeable. This feature can also add natural blurring to the boundary between the captured image and the background. Available when [Export Format] is set to [![]() ] or [
] or [![]() ]. This option is available under the following conditions.
]. This option is available under the following conditions.
- Clips captured using RF-S3.9mm F3.5 STM DUAL FISHEYE
- Clips captured using RF5.2mm F2.8 L DUAL FISHEYE
Parallax Correction
The application automatically compensates for the margin of error between images from the left and right lens. This option is selected by default. Note that correction may take some time, depending on the clip.

Automatic Horizontal Correction
For automatic tilt correction, select [Tilt]. For automatic roll correction, select [Roll]. Note that correction may take some time, depending on the clip.

Caution
- Not available for the following clips. Using [Manual Horizontal Correction] is recommended.
- Images with missing VR/3D conversion metadata
- Clips captured using RF7-14mm F2.8-3.5 L FISHEYE STM
Manual Horizontal Correction
You can manually straighten clips while checking the preview.
Drag the Pan, Tilt, and Roll sliders as needed or enter angles in the boxes next to the sliders.
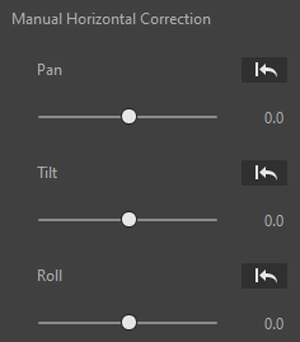
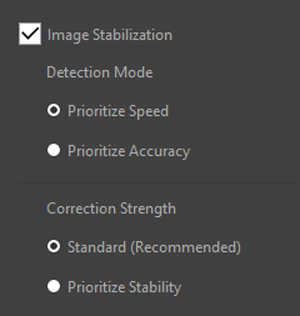
Image Stabilization
To straighten crooked clips automatically, select [Image Stabilization]. Note that correction may take some time, depending on the clip.
Clips with image stabilization applied are labeled with [![]() ] in the [Status] column.
] in the [Status] column.
Options displayed vary depending on the camera used to capture the clip.
Caution
- Not available for the following clips.
- Clips captured using RF7-14mm F2.8-3.5 L FISHEYE STM
EOS R5 Mark II, EOS R6 Mark III, EOS R6 V, EOS R50 V, EOS C400, EOS C80, EOS C50
-
Detection Mode
[Prioritize Speed] may be convenient when processing long clips.
[Prioritize Accuracy] is a good choice when image stabilization is most important.
Note that [Detection Mode] options are not available in these shooting situations.
- Time-lapse recording (EOS R5 Mark II, EOS R6 Mark III, EOS R6 V, EOS R50 V)
- Slow/fast motion recording (EOS R6 Mark III, EOS R6 V, EOS R50 V, EOS C400, EOS C80, or EOS C50)
- Frame recording (EOS C400, EOS C80, or EOS C50)
- Interval recording (EOS C400, EOS C80, or EOS C50)
- High Frame Rate recording at 100 fps or higher (EOS R6 Mark III or EOS R6 V)
-
Correction Strength
[Standard (Recommended)] is suitable for typical shooting situations. For image stabilization stronger than [Standard (Recommended)], consider choosing [Prioritize Stability].
EOS R5, EOS R6 Mark II, EOS R7, EOS R50, EOS R5 C
-
Correction Strength
[Standard (Recommended)] is suitable for typical shooting situations. For image stabilization stronger than [Standard (Recommended)], consider choosing [Prioritize Stability].
[Standard (Recommended)] is suitable for typical shooting situations. For image stabilization stronger than [Standard (Recommended)], consider choosing [Prioritize Stability].
Caution
- Auto image stabilization is not applied to clips 10 sec. or shorter.
- Do not use auto image stabilization for clips captured from a tripod or the like.
- Effective image stabilization may be difficult for scenes such as these.
- Full of white walls or patterned subjects
- Subjects moving across most of the screen
- Full of erratic subjects, such as ocean ripples or wind-shaken trees
- Jaggies may occur in peripheral image areas when image stabilization is used.
Note
- You can use other features during Image Stabilization processing.