Neural network Image Processing Tool

  • Compatible cameras: EOS R1, EOS R3, EOS R5, EOS R5 Mark II, EOS R5 C, EOS R6, EOS R6 Mark II, EOS R7, EOS R8, EOS R10, EOS R50, or EOS-1D X Mark III

Using the Neural network Image Processing Tool (hereafter, “the tool”), you can apply the following deep learning-based image processing to supported images ().

[Neural network Noise Reduction]

  • Noise reduction

[Neural network Lens Optimizer]

  • Digital Lens Optimizer

[Neural network Demosaic]

  • Suppression of jaggies, moirĂ©, and false colors

Before using the tool, you will need to download it to your computer and purchase a subscription. See Downloading and Installing and Purchasing a Subscription for instructions.

Caution

  • Internet connectivity required, which requires a contract with a provider and an existing network connection. Connection or access point fees may apply.

Images Supported by the Tool

The tool can be used for RAW images (except those captured in RAW burst mode, or RAW movies) from compatible cameras. Note that [Neural network Lens Optimizer] can be applied to images captured with the following lenses.

  • RF10-20mm F4 L IS STM
  • RF14-35mm F4 L IS USM
  • RF15-30mm F4.5-6.3 IS STM
  • RF15-35mm F2.8 L IS USM
  • RF24-50mm F4.5-6.3 IS STM
  • RF24-70mm F2.8 L USM
  • RF24-105mm F4 L IS USM
  • RF24-105mm F4-7.1 IS STM
  • RF24-105mm F2.8 L IS USM Z
  • RF24-240mm F4-6.3 IS USM
  • RF28-70mm F2 L USM
  • RF28-70mm F2.8 IS STM
  • RF70-200mm F2.8 L IS USM
  • RF70-200mm F2.8 L IS USM Z/EXTENDER RF1.4x/EXTENDER RF2x
  • RF100-300mm F2.8 L IS USM/EXTENDER RF1.4x/EXTENDER RF2x
  • RF100-400mm F5.6-8 IS USM/EXTENDER RF1.4x/EXTENDER RF2x
  • RF100-500mm F4.5-7.1 L IS USM/EXTENDER RF1.4x/EXTENDER RF2x
  • RF70-200mm F4 L IS USM
  • RF200-800mm F6.3-9 IS USM/EXTENDER RF1.4x/EXTENDER RF2x
  • RF24mm F1.8 MACRO IS STM
  • RF28mm F2.8 STM
  • RF35mm F1.4 L VCM
  • RF35mm F1.8 MACRO IS STM
  • RF50mm F1.2 L USM
  • RF50mm F1.8 STM
  • RF85mm F1.2 L USM
  • RF85mm F1.2 L USM DS
  • RF85mm F2 MACRO IS STM
  • RF100mm F2.8 L MACRO IS USM
  • RF135mm F1.8 L IS USM
  • RF400mm F2.8 L IS USM/EXTENDER RF1.4x/EXTENDER RF2x
  • RF600mm F4 L IS USM/EXTENDER RF1.4x/EXTENDER RF2x
  • RF-S10-18mm F4.5-6.3 IS STM
  • RF-S18-45mm F4.5-6.3 IS STM
  • RF-S18-150mm F3.5-6.3 IS STM
  • RF-S55-210mm F5-7.1 IS STM

Tool System Requirements

OS
(operating system)
Windows 11, Windows 10 (1903) or later
CPU Core i7 or better
RAM
(memory)
16 GB
GPU
(video card)
4 GB or more of VRAM, support for DirectX 12

For verified video cards, visit the Canon website.

Downloading and Installing

Download and install the tool as follows.

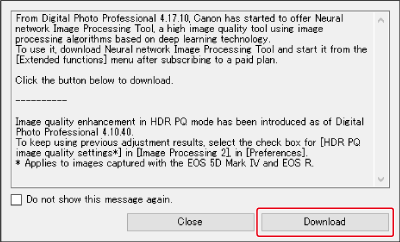
  1. Select [Download/Update] when starting DPP, or later from the [Extended functions] menu.

  2. Select [Download].

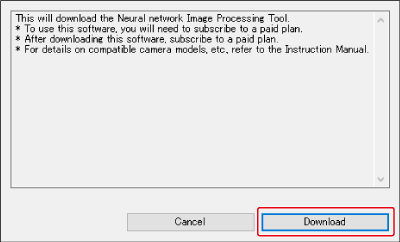
  3. Select [Download].

    • DPP now downloads the tool installer.
    • You can also download the tool from the Canon website.
  4. Start the installer.

    • Double-click the downloaded installer.
    • Follow the instructions displayed to complete the installation process.

Purchasing a Subscription

Purchase a subscription for the tool as follows.

  1. Select [Neural network Image Processing Tool] in the [Extended functions] menu.

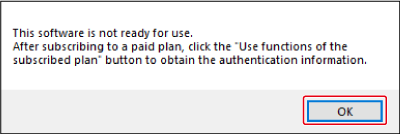
  2. Click [OK].

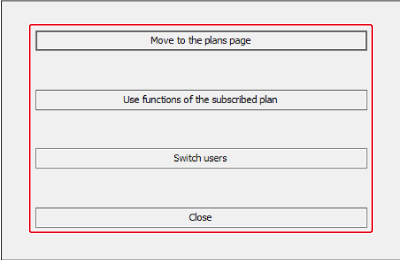
  3. Select an option.

    • To purchase a subscription, select [Move to the plans page] and follow the instructions displayed.
    • If multiple Canon IDs are managed on your computer, you can click [Switch users] to switch to your preferred Canon ID to use for the subscription.
    • After subscribing, select [Use functions of the subscribed plan] and sign in to use this tool.

Caution

  • Deleting the Canon ID for your subscription will prevent you from using the subscription.

Using the Tool

Before using the tool, transfer the RAW images you will process to the computer.

  1. Start DPP.

  2. Select an image.

    • You can also select multiple images at once for processing.
  3. Select [Neural network Image Processing Tool] in the [Extended functions] menu.

    • Click [Yes] if a message appears about downloading processing data for the tool. Click [Close] after downloading is complete.
  4. Select [Yes].

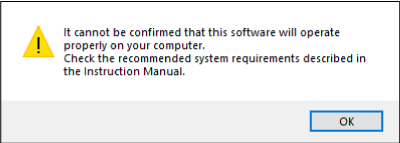
    • The tool now checks your operating environment.
  5. Click [OK].

  6. Configure tool features as needed.

    1. Select the file format to output. When working with the output file in macOS or processing it with image editing software developed by other companies, select [.CR3] (CR3 image) as the file format.
    2. The image file to be processed is displayed. When adding a file, use the buttons shown in (3) or drag and drop the file to this area.
    3. Add or delete a file.
    4. Set the effect level for [Neural network Noise Reduction] and [Neural network Lens Optimizer] (left: low, right: high). Consider checking the image processing results under default settings before changing the settings.
    5. Specify the save destination of the file to be output.
    6. Click [Execute] after the settings are configured.
  7. Click [OK].

  8. Click [Exit].

    Caution

    • [Neural network Demosaic] is not adjustable.
    • [Neural network Demosaic] is not applied when the output file format is [.CR3].
    • CRN images have a larger file size than the original RAW images (about 10 times larger, depending on the image).
    • CRN files cannot be used in macOS.
    • The output files do not retain the recipes of the original RAW images.
    • Image processing may take some time, depending on the type of computer and video card, file sizes of original RAW images, and other factors.
    • If necessary, consider either setting the effect level for [Neural network Lens Optimizer] or [Neural network Noise Reduction] and applying this tool again or adjusting the sharpness of the resulting output files.
    • Factors such as the condition of original RAW images may make it difficult to obtain your desired effect from this tool.

    Note

    • Applying this tool's Digital Lens Optimizer processing to RAW images captured with lenses not supported by the tool will process the images using the normal Digital Lens Optimizer. Otherwise, diffraction is corrected. Note that diffraction may not be corrected in some cases, depending on the type of lens used.
    • You can check the tool's operating environment by clicking [System requirements check] in the [Settings] menu. This may be useful if you change the computer configuration, for example.