Transfer images over wireless connections
- Application settings
- Smartphone settings (tethered connections only)
- EOS R3/EOS-1D X Mark III
- EOS R5/EOS R5 C/EOS R6
- EOS R6 Mark II
- EOS-1D X Mark II
Application settings
Use MFT to configure the connection settings.
-
Tap the top right of the screen.

-
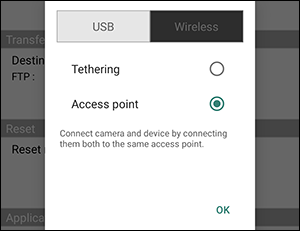
Tap [Connection mode].
-
Select the connection method.
- Select [Wireless].
Android

iOS


-
Tap the top left of the screen.

Image transfer methods vary by camera. Please refer to the following sections.
Smartphone settings (tethered connections only)
Use the following settings when using a tethered connection.
Android
Tethered connection settings for Android devices may vary by manufacturer and model. Please refer to your smartphone's instruction manual.
iOS
-
Open [Settings] in the app, then tap [General] → [About] → [Name].
-
Set the network name on the [Name] screen.
- The network name will be displayed when connecting to the network.
-
Tap [Settings] → [Personal Hotspot].
-
Set [Allow Others to Join] to ON.
- Tap [OK].
-
Select [Wi-Fi Password] and set a password.
- The specified password will be input when using a tethered connection.
Caution
- Make sure that [Allow Others to Join] is set to OFF when not using MFT.
EOS R3/EOS-1D X Mark III
-
Operations on the camera (1)
-
Press the
button on the camera.
-
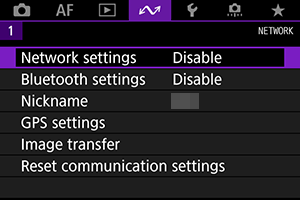
Select [
: Network settings].
-
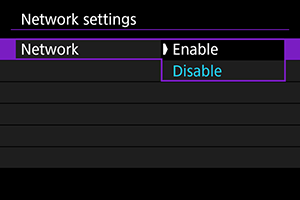
Select [Enable].
-
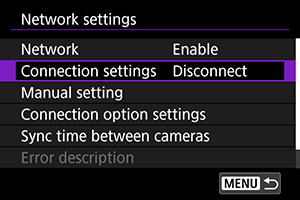
Select [Connection settings].
-
Select [SET* Unspecified].
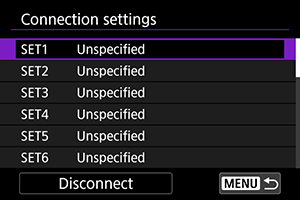
-
Select [Create with wizard].

-
Select [Configure online].
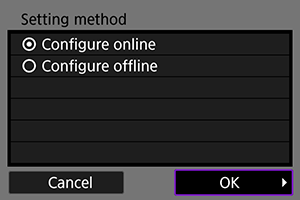
- Select [OK].
-
Select [Smartphone].

- Select [OK].
-
Select [Wi-Fi].

- Select [OK].
-
Select [New settings].
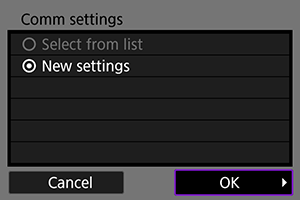
- Select [OK].
-
Select a network.

- When using a tethered connection, select the name of the network specified in Smartphone settings (tethered connections only).
- When using an access point, select the name of the access point you want to connect to.
-
Enter the password.
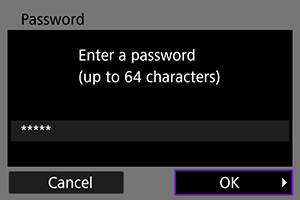
- When using a tethered connection, enter the password specified in Smartphone settings (tethered connections only).
- When using an access point, enter the password for the access point to connect to.
- Enter the password and select [OK].
-
Select [Auto setting].
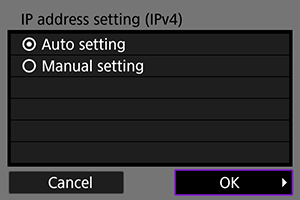
- Select [OK].
-
Select [Disable].
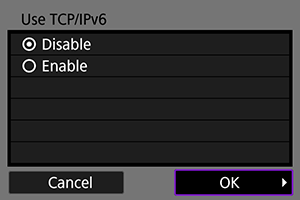
- Select [OK].
-
Press
.

-
Select [New settings].

- Select [OK].
-
Verify the IP address.
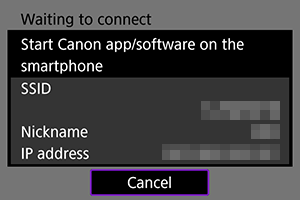
- When using a tethered connection, verify the IP address displayed on the camera monitor.
-
-
Operations on the smartphone (1)
-
Launch MFT.

-
Tap [Connect] (tethered connections only).

-
Follow the directions.
Tethered connections

- Enter the IP address verified in Step 17.
- Tap [OK].
Access point mode
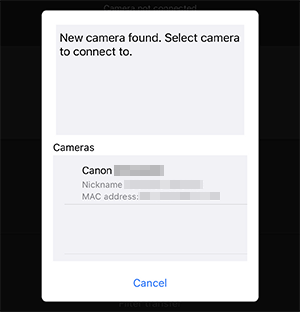
- Tap the camera to connect to.
-
-
Operations on the camera (2)
-
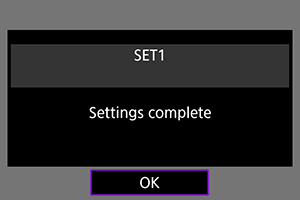
Select [OK].

-
Press
.

-
Press
.
-
-
Operations on the smartphone (2)
-
Transfer the image.
- Use MFT to transfer the image to the FTP server.
- You can change or edit the transfer destination before transferring images. For details, refer to Changing/editing the transfer destination before transferring images.
-
EOS R5/EOS R5 C/EOS R6
-
Operations on the camera (1)
-
Press the
button on the camera.
-
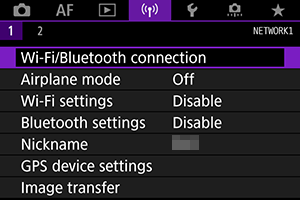
Select [
: Wi-Fi/Bluetooth connection].
-
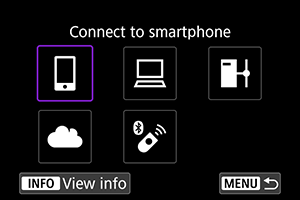
Select [
Connect to smartphone].
-
Select [OK].

-
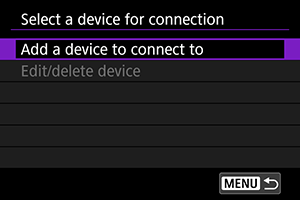
Select [Add a device to connect to].
-
Select [Do not display].

-
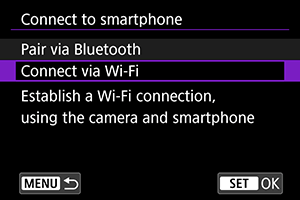
Select [Connect via Wi-Fi].
-
Select [Switch network].

-
Select a network.
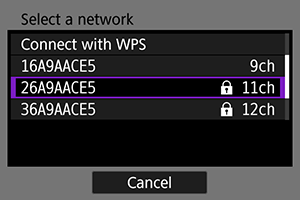
- When using a tethered connection, select the name of the network specified in Smartphone settings (tethered connections only).
- When using an access point, select the name of the access point you want to connect to.
-
Enter the password.

- When using a tethered connection, enter the password specified in Smartphone settings (tethered connections only).
- When using an access point, enter the password for the access point to connect to.
- Enter the password and select [OK].
-
Select [Auto setting].

- Select [OK].
-
Select [Disable].

- Select [OK].
-
Verify the IP address.
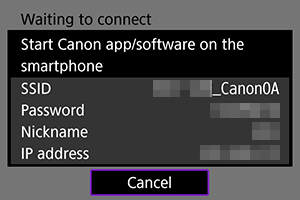
- When using a tethered connection, verify the IP address displayed on the camera monitor.
-
-
Operations on the smartphone (1)
-
Launch MFT.

-
Tap [Connect] (tethered connections only).

-
Follow the directions.
Tethered connections

- Enter the IP address verified in Step 13.
- Tap [OK].
Access point mode

- Tap the camera to connect to.
-
-
Operations on the camera (2)
-
Select [OK].

-
-
Operations on the smartphone (2)
-
Transfer the image.
- Use MFT to transfer the image to the FTP server.
- You can change or edit the transfer destination before transferring images. For details, refer to Changing/editing the transfer destination before transferring images.
-
EOS R6 Mark II
-
Operations on the camera (1)
-
Press the
button on the camera.
-
Select [
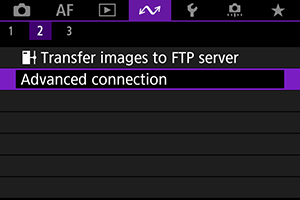
: Advanced connection].
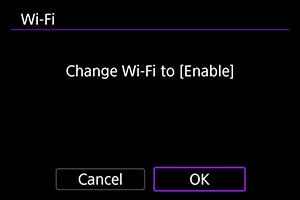
-
Select [OK].
-
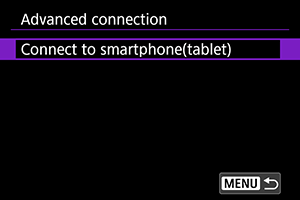
Select [Connect to smartphone(tablet)].
-
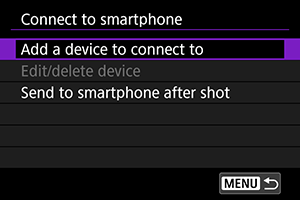
Select [Add a device to connect to].
-
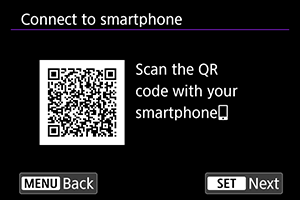
Press
.
-
Select a network.
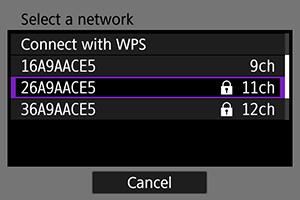
- When using a tethered connection, select the name of the network specified in Smartphone settings (tethered connections only).
- When using an access point, select the name of the access point you want to connect to.
-
Enter the password.
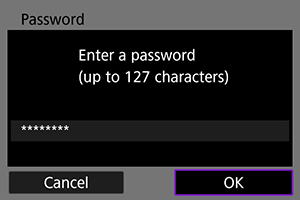
- When using a tethered connection, enter the password specified in Smartphone settings (tethered connections only).
- When using an access point, enter the password for the access point to connect to.
- Enter the password and select [OK].
-
Select [Auto setting].
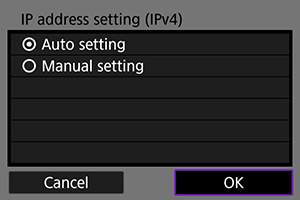
- Select [OK].
-
Select [Disable].

- Select [OK].
-
Verify the IP address.
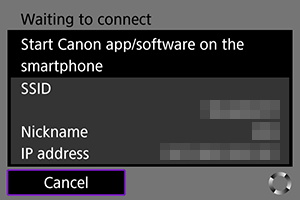
- When using a tethered connection, verify the IP address displayed on the camera monitor.
-
-
Operations on the smartphone (1)
-
Launch MFT.

-
Tap [Connect] (tethered connections only).

-
Follow the directions.
Tethered connections

- Enter the IP address verified in Step 11.
- Tap [OK].
Access point mode

- Tap the camera to connect to.
-
-
Operations on the camera (2)
-
Select [OK].
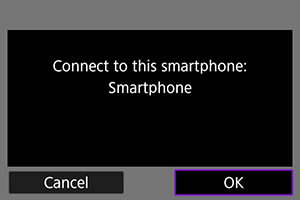
-
-
Operations on the smartphone (2)
-
Transfer the image.
- Use MFT to transfer the image to the FTP server.
- You can change or edit the transfer destination before transferring images. For details, refer to Changing/editing the transfer destination before transferring images.
-
EOS-1D X Mark II
Attach wireless file transmitter WFT-E8 to the camera and follow these steps.
-
Operations on the camera (1)
-
Press the
button on the camera.
-
Select [
: Communication settings].
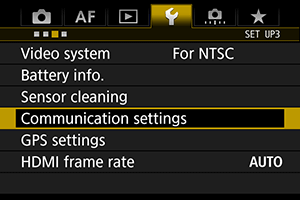
-
Select [Enable].

-
Select [Network settings].
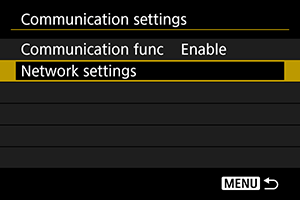
-
Select [Connection settings].

-
Select [SET* Unspecified].

-
Select [Connection wizard].
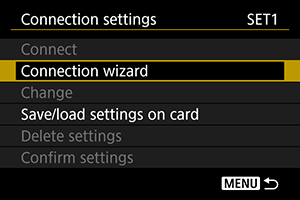
-
Select [Smartphone].

- Select [OK].
-
Select [Wireless].
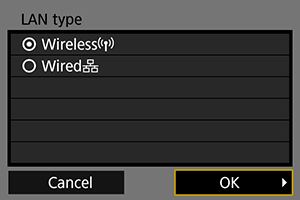
- Select [OK].
-
Select [Select a network].

- Select [OK].
-
Select the network name.
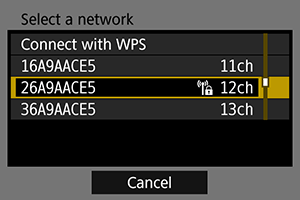
- When using a tethered connection, select the name of the network specified in Smartphone settings (tethered connections only).
- When using an access point, select the name of the access point you want to connect to.
-
Enter the password.

- When using a tethered connection, enter the password specified in Smartphone settings (tethered connections only).
- When using an access point, enter the password for the access point to connect to.
- Enter the password and select [OK].
-
Select [Auto setting].
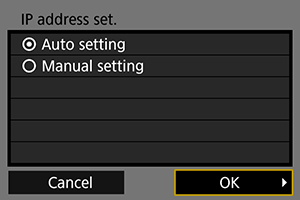
- Select [OK].
-
Verify the IP address.
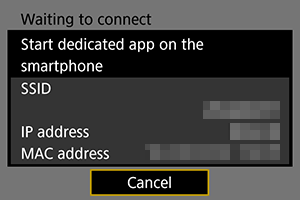
- When using a tethered connection, verify the IP address displayed on the camera monitor.
-
-
Operations on the smartphone (1)
-
Launch MFT.

-
Tap [Connect].

-
Follow the directions.
Tethered connections

- Enter the IP address verified in Step 14.
- Tap [OK].
Access point mode

- Tap the camera to connect to.
-
-
Operations on the camera (2)
-
Select [OK].
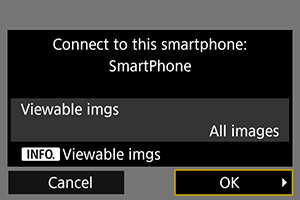
- Once [Settings complete] appears, press
.
- Once [Settings complete] appears, press
-
-
Operations on the smartphone (2)
-
Transfer the image.
- Use MFT to transfer the image to the FTP server.
- You can change or edit the transfer destination before transferring images. For details, refer to Changing/editing the transfer destination before transferring images.
-