Shooting Information Display
- Customizing Information on the Screen
- Customizing Information in the Viewfinder
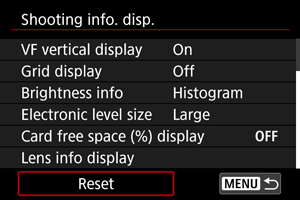
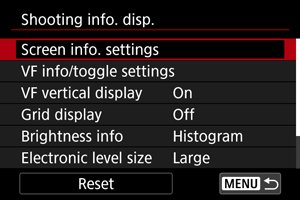
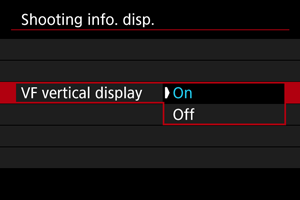
- Viewfinder Vertical Display
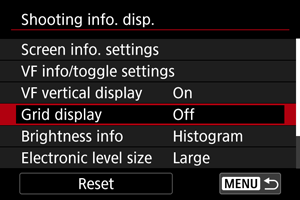
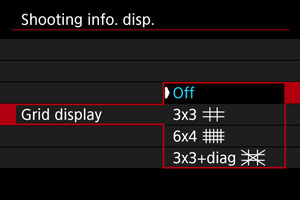
- Grid
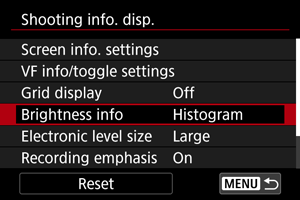
- Brightness Information
- Electronic Level Size
- Card Free Space (%) Display
- Lens Information Display
- Recording Emphasis
- Aspect Marker Setting
- Clearing Settings
You can customize the details and screens of information shown on the screen or in the viewfinder when you shoot.
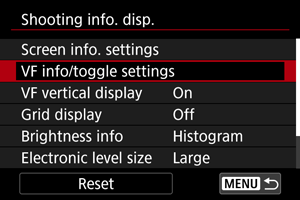
Customizing Information on the Screen
-
Select [Screen info. settings].
-
Select screens.
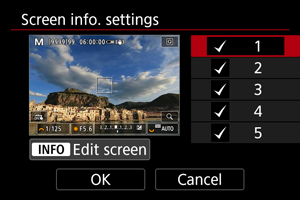
- Turn the
 or
or  dial or press
  up or down to select screens of information to show on the camera.
 - For information you prefer not to display, press
 to clear the checkmark [
 ].
]. - To edit the screen, press the
 button.
- Turn the
-
Edit the screen.
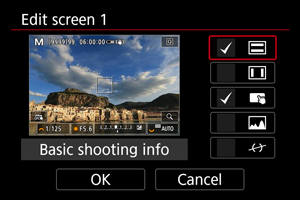
- Turn the or dial or press up or down to select options to show on the screen.
- For items you prefer not to display, press to clear the checkmark [].
- Select [OK] to register the setting.
- Turn the
Customizing Information in the Viewfinder
-
Select [VF info/toggle settings].
-
Select screens.
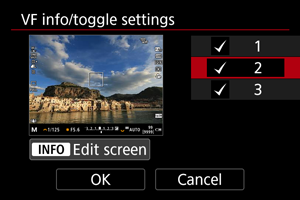
- Turn the or dial or press up or down to select information screens to show in the viewfinder.
- For information you prefer not to display, press to clear the checkmark [].
- To edit the screen, press the button.
- Turn the
-
Edit the screen.
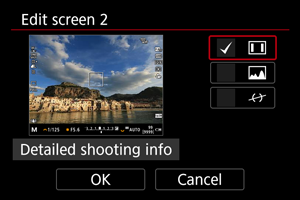
- Turn the or dial or press up or down to select options to show on the information screen in the viewfinder.
- For items you prefer not to display, press to clear the checkmark [].
- Select [OK] to register the setting.
- Turn the
Viewfinder Vertical Display
You can select how viewfinder information is displayed when you are shooting still photos vertically.
Grid
A grid can be displayed on the screen.
Brightness Information
You can set the brightness information format (histogram or waveform monitor) available when the ![]() button is pressed during shooting standby.
button is pressed during shooting standby.
The waveform monitor is available during movie recording.
-
Select [Brightness info].
-
Select an option.
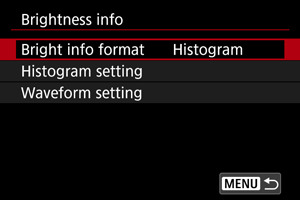
-
Bright info format
Set your preferred display during movie recording: [Histogram] or [Wave. monitor]. During still photo shooting, only [Histogram disp] is available.
-
Histogram setting
Select the type of histogram ([Brightness] or [RGB]) and display size ([Large] or [Small]).
-
Waveform setting
Select the type of waveform ([Line] or [RGB]).
-
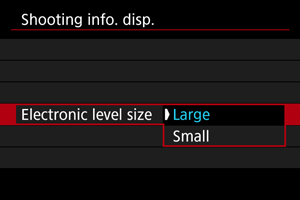
Electronic Level Size
You can select the display size of the electronic level.
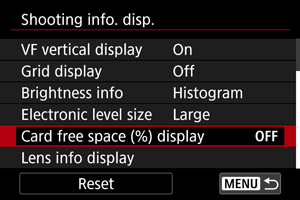
Card Free Space (%) Display
You can display card free space on the screen.
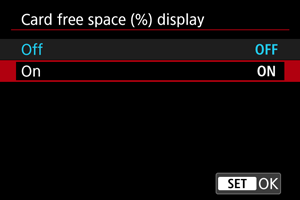
Note
- During still photo shooting or when writing to cards, the number of available shots is shown instead of the free space.
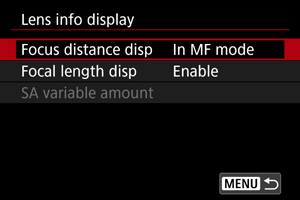
Lens Information Display
You can display information about the lens in use.
-
Select [Lens info display].

-
Select an option.
-
Focus distance disp
You can display focus distance when using RF or RF-S lenses. In focus distance display, you can select the timing and unit of measurement.
-
Focal length disp
You can display the focal length of the lens in use.
-
SA variable amount
You can display the amount of correction set when using lenses featuring spherical aberration control.
SA: spherical aberration
-
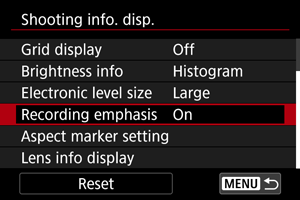
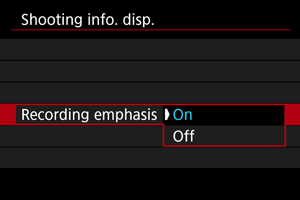
Recording Emphasis
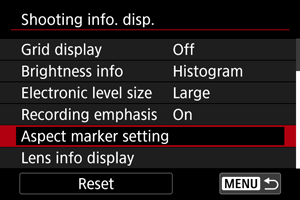
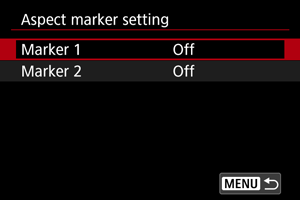
Aspect Marker Setting
If you will change the aspect ratio when editing the recorded movie, you can display up to two aspect markers on the movie recording screen (during standby and recording) to be aware of the final angle of view after editing.
-
Select [Aspect marker setting].
-
Select aspect markers.
-
Select an option.
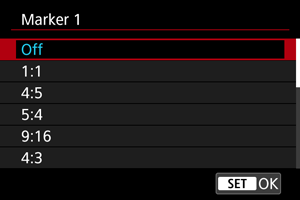
- Select a display option.
Note
- Markers are not shown during movie playback (recorded movies are not tagged with aspect marker information).
- Each marker is displayed in different colors.