Connecting to EOS Utility
- Operating the Camera Using EOS Utility
- Editing/Deleting Devices for Connections
- Reconnecting Using Connection Information
This section describes how to connect the camera to a computer via Wi-Fi and perform camera operations using EOS software or other dedicated software. Install the latest version of software on the computer before setting up a Wi-Fi connection ().
For computer operating instructions, refer to the computer user manual.
Operating the Camera Using EOS Utility
Using EOS Utility (EOS software), you can import images from the camera, control the camera, and perform other operations.
Steps on the camera (1)
-
Select [OK].
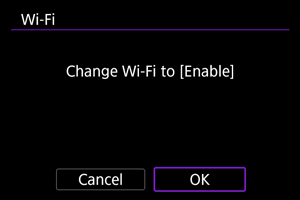
- This screen is not displayed if the Wi-Fi setting is already set to [Enable].
-
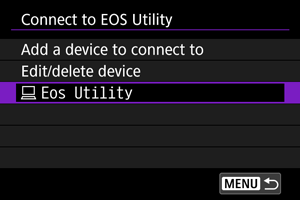
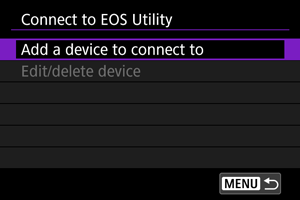
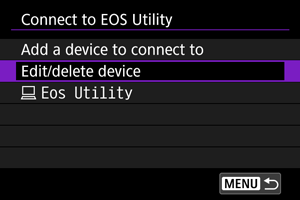
Select [Add a device to connect to].
-
Check the SSID (network name) and password.
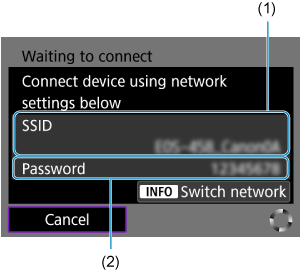
- Check the SSID (1) and Password (2) displayed on the camera screen.
- To switch networks, press the
 button. For instructions on configuring communication functions, see Basic Communication Settings.
Steps on the computer (1)
-
Select the SSID, then enter the password.
Computer's screen (sample)
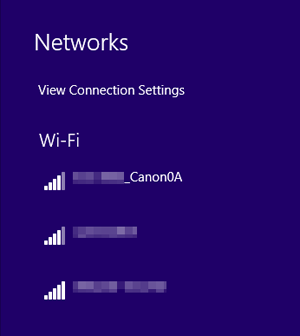
- On the computer's network setting screen, select the SSID checked in step 4 in Steps on the camera (1).
- For the password, enter the password checked in step 4 in Steps on the camera (1).
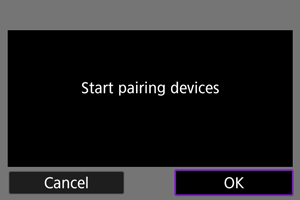
Steps on the camera (2)
-
Select [OK].
-
The following message is displayed. “******” represents the last six digits of the MAC address of the camera to be connected.
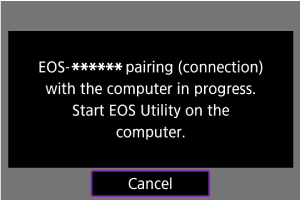
-
Steps on the computer (2)
-
Start EOS Utility.
-
In EOS Utility, click [Pairing over Wi-Fi/LAN].
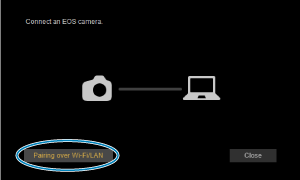
- If a firewall-related message is displayed, select [Yes].
-
Click [Connect].
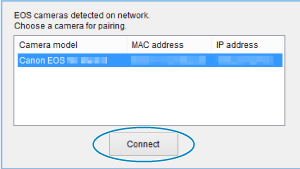
- Select the camera to connect to, then click [Connect].
Steps on the camera (3)
-
Establish a Wi-Fi connection.
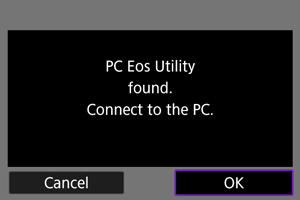
The Wi-Fi connection to a computer is now complete.
- Operate the camera using EOS Utility on the computer.
- To reconnect via Wi-Fi, see Reconnecting via Wi-Fi/Bluetooth.
[ Communicating] screen
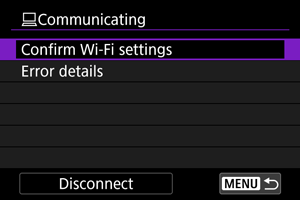
-
Confirm Wi-Fi settings
-
Error details
-
Disconnect
Terminates the Wi-Fi connection.
Caution
-
If the Wi-Fi connection is terminated while recording a movie with remote shooting, the following will occur.
- Any movie recording in progress in movie recording mode will continue.
- Any movie recording in progress in still photo shooting mode will end.
- You cannot use the camera to shoot in still photo shooting mode when it is set to movie recording mode in EOS Utility.
- With a Wi-Fi connection to EOS Utility established, certain functions are unavailable.
- In remote shooting, the AF speed may become slower.
- Depending on the communication status, image display or shutter release timing may be delayed.
- In Remote Live View shooting, the rate of image transmission is slower compared to a connection via an interface cable. Therefore, moving subjects cannot be displayed smoothly.
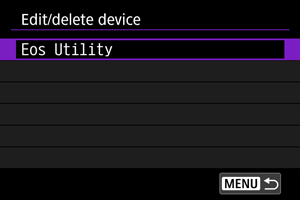
Editing/Deleting Devices for Connections
Before editing or deleting connection settings for other devices, end the Wi-Fi connection.
-
Select [Edit/delete device].
-
Select the intended device.
-
Select an option.
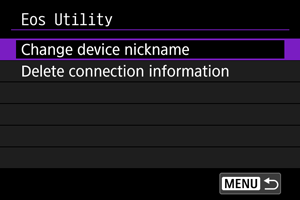
Changing device nicknames
You can change the nickname of devices the camera connects to.
Deleting connection information
You can delete the connection information.
Reconnecting Using Connection Information
The configured connection information can be used to connect again.