Attaching and Detaching RF/RF-S Lenses
Caution
- Do not look at the sun directly through any lens. Doing so may cause loss of vision.
- When attaching or detaching a lens, set the camera's power switch to
 .
. - If the front part (focusing ring) of the lens rotates during autofocusing, do not touch the rotating part.
Tips for avoiding smudges and dust
- When changing lenses, do it quickly in a place with minimal dust.
- When storing the camera without a lens attached, be sure to attach the body cap to the camera.
- Remove smudges and dust on the body cap before attaching it.
Note
- With RF-S lenses, an approx. 1.6× crop factor is applied to the center of the regular image area.
Attaching a Lens
-
Remove the caps.


- Remove the rear lens cap (1) and body cap (2) by turning them as shown by the arrows.
-
Attach the lens.
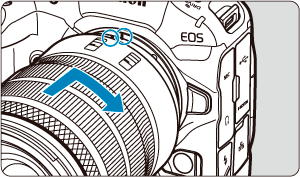
- Align the red mount index on the lens with the red mount index on the camera and turn the lens as shown by the arrow until it clicks in place.
-
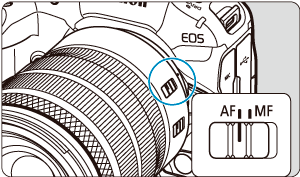
Set the focus mode to AF.
- AF stands for autofocus.
- MF stands for manual focus. Autofocus is disabled.
-
For RF lenses with a focus mode switch
Set the lens's focus mode switch to
 .
.
-
For RF lenses without a focus mode switch
Set [
 : Focus mode] to [AF].
-
Remove the front lens cap.
Detaching a Lens
-
While pressing the lens release button, turn the lens as shown by the arrow.
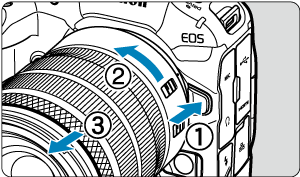
- Turn the lens until it stops, then detach it.
- Attach the rear lens cap to the lens you removed.