Date/Time/Zone
When you turn on the power for the first time or if the date/time/zone have been reset, follow these steps to set the time zone first.
By setting the time zone first, you can simply adjust this setting as needed in the future and the date/time will be updated to match it.
Since the captured images will be appended with the shooting date and time information, be sure to set your date/time.
-
Set the time zone.
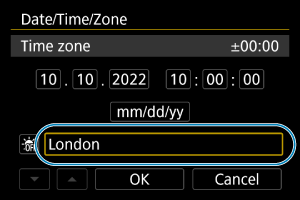
- Use the
keys to select [Time zone], then press the
button.
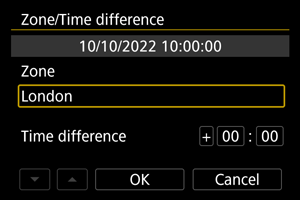
- Press the
button.
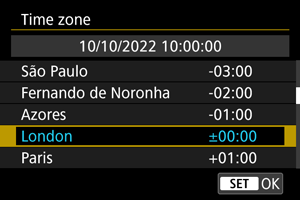
- Use the
keys to select the time zone, then press the
button.
- If your time zone is not listed, press the
button, then set the difference from UTC in [Time difference].
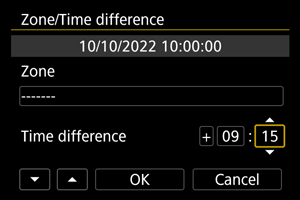
- Use the
keys to select a [Time difference] option (+–/hour/minute), then press the
button.
- Set with the
keys, then press the
button.
- After entering the time zone or time difference, select [OK].
- Use the
-
Set the date and time.
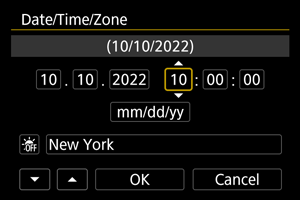
- Use the
keys to select an item, then press the
button.
- Set with the
keys, then press the
button.
- Use the
-
Set daylight saving time.
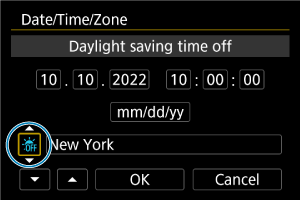
- Set it as necessary.
- Select [
] or [
], then press the
button.
- When the daylight saving time is set to [
], the time set in step 3 will advance by 1 hour. If [
] is set, the daylight saving time will be canceled and the time will go back by 1 hour.
-
Exit the setting.
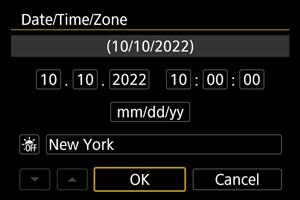
- Select [OK].
Caution
- The date, time, and time zone settings may be reset when the camera is stored without the battery, when the battery is exhausted, or when it is exposed to freezing temperatures for an extended period. If this happens, set them once again.
- After changing [Zone/Time difference], check that the correct date/time are set.
Note
- Auto power off time may be extended while the [
: Date/Time/Zone] screen is displayed.