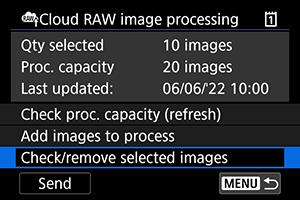
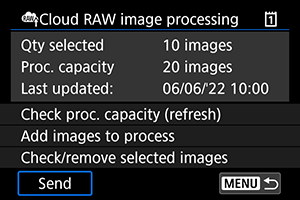
Cloud RAW Image Processing
- Checking Processing Capacity
- Adding Images to Process
- Checking/Removing Selected Images
- Uploading Images
You can upload ![]() or
or ![]() images to image.canon for processing into JPEG or HEIF images. The RAW images remain the same as when captured, so you can adjust the processing conditions to create multiple JPEGs or HEIFs.
images to image.canon for processing into JPEG or HEIF images. The RAW images remain the same as when captured, so you can adjust the processing conditions to create multiple JPEGs or HEIFs.
Caution
-
Complimentary enrollment at image.canon must be completed in advance.
Note that cloud RAW image processing requires a paid subscription. For subscription details, visit the image.canon website.
- Images generated by this image processing are saved on image.canon servers. The processed images are not saved to the camera.
Checking Processing Capacity
You can check how many images you can process at image.canon.
-
Select [Check proc. capacity (refresh)].
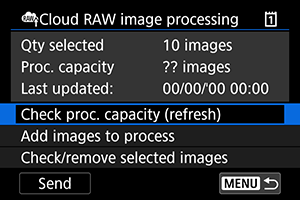
- The camera accesses image.canon.
-
Check the quantity in [Proc. capacity].
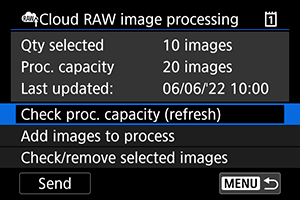
- Information in [Proc. capacity] is updated.
Caution
- [Proc. capacity] is [0] unless you have a paid subscription for cloud RAW image processing. You will receive subscription information at the email address on record at image.canon if you check the processing capacity without a subscription.
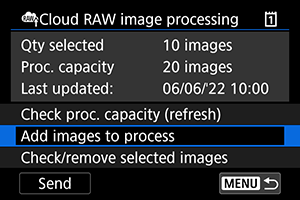
Adding Images to Process
-
Select [Add images to process].
-
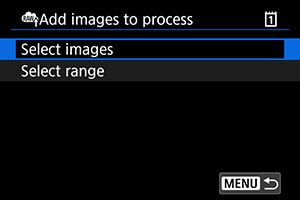
Select an option, then select images.
- You can select multiple images to process at once.
Select images

- Turn the
 dial to select an image to process, then press the
  button.
 - Press the
 button.
Select range
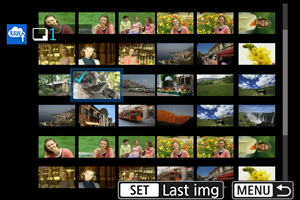
- Select the first image (start point).
- Next, select the last image (end point). A checkmark [
 ] will be appended to all the images within the range between first and last images.
 - To process other images, repeat this step.
- Press the button.
-
Set the desired processing conditions.
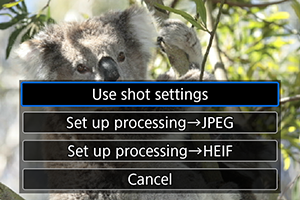
Use shot settings
- Images are processed using image settings at the time of capture.
- Images captured with [
 : HDR shooting
  ] set to [Enable] are processed to create HEIFs, and images captured with this function set to [Disable] are processed to create JPEGs.
Set up processing→JPEG/Set up processing→HEIF
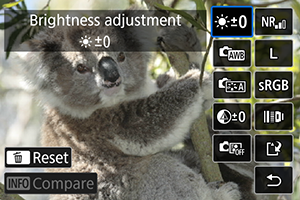
- Use
 to select an item.
 - Turn the
 or dial to switch the setting.
 - Press the button to access the function setting screen.
- To return to the image settings at the time of shooting, press the
 button and select [OK] when “Revert to shot settings” is displayed.
Comparison screen
- You can switch between the [After change] and [Shot settings] screens by pressing the
 button and turning the dial.
 - Items in orange on the [After change] screen have been modified since the time of capture.
- Press the
 button to return to the processing conditions screen.
-
Select [Save].
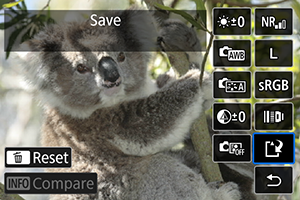
- When using [Set up processing→JPEG] or [Set up processing→HEIF], select [
 ] (Save).
 - Read the message and select [OK].
- When using [Set up processing→JPEG] or [Set up processing→HEIF], select [
-
Add to the upload list.

- Read the message and select [OK].
Checking/Removing Selected Images
-
Select [Check/remove selected images].
-
Browse your images.
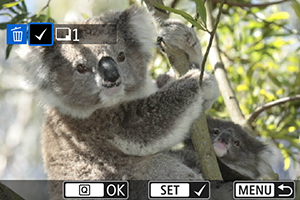
- Turn the dial to check images.
-
To remove from the upload list, press the
button.[
] is displayed. - To check image processing conditions, press the button.
- Turn the
-
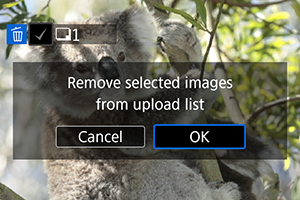
Remove the current image from the upload list as needed.
-
Press the
button.Select [OK] when a message is displayed about removing images from the upload list.
-
Uploading Images
-
Select [Send].
-
Read the message.
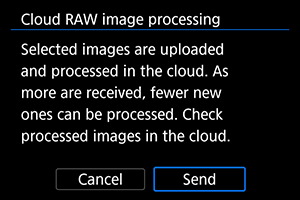
- Read the message, then tap [Send].
- You will be notified at the email address on record for your Canon ID when your files have been received for processing and when processing is complete.
Caution
- The number of images and processing capacity may not be updated correctly if an [Err 138] transmission error occurs during uploading. Note that even if the number of images and processing capacity are not updated correctly, images may be processed on the server. Wait until you receive notification by email that processing is complete.
- The camera continues to upload images even if [Stop] is selected on the [Send images] screen. To cancel uploading, select [OK] on the [Cancel transmission] screen while the access lamp is blinking.
- Depending on when you select [OK] on the [Cancel transmission] screen, uploading may continue, and the images may be processed on the server.