Print Ordering (DPOF)
DPOF (Digital Print Order Format) enables you to print images recorded on the card according to your printing instructions such as the image selection, quantity to print, etc. You can print multiple images in one batch or create a print order for a photofinisher.
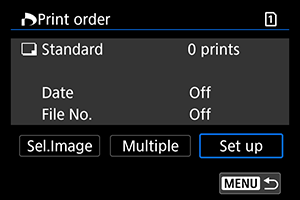
You can set the print settings such as print type, date imprinting, file number imprinting, etc. The print settings will be applied to all the images specified for printing. (They cannot be set individually for each image.)
Print Options
-
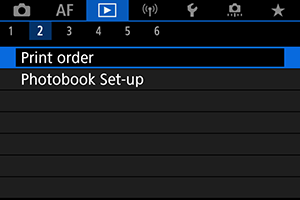
Select [
: Print order].
-
Select [Set up].
-
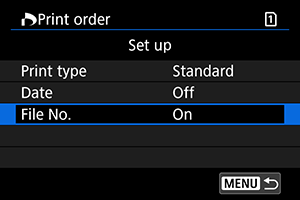
Set the options as desired.
- Set [Print type], [Date], and [File No.] options.
Print type Standard Prints one image on one sheet. Index Multiple thumbnail images are printed on one sheet. Both Prints both the standard and index prints. Date On [On] imprints the recorded date of the captured image. Off File No. On [On] imprints the file number. Off -
Exit the setting.
- Press the
button.
- Next, select [Sel.Image] or [Multiple] to specify the images to be printed.
- Press the
Caution
- If you print an image with a large image size using the [Index] or [Both] setting (), the index print may not be printed with certain printers. In this case, resize the image (), then print the index print.
- Even if [Date] and [File No.] are set to [On], the date or file number may not be imprinted, depending on the print type setting and printer.
- With [Index] prints, the [Date] and [File No.] cannot both be set to [On] at the same time.
- When printing with DPOF, use the card for which print order specifications are set. You cannot print in the specified print order if you extract just the images from the card for printing.
- Certain DPOF-compliant printers and photofinishers may not be able to print the images as you specified. When using a printer, refer to the printer's instruction manual. When requesting service from a photofinisher, ask in advance.
- Do not use this camera to configure print settings for images with DPOF settings set up on another camera. All the print orders may be overwritten inadvertently. Also, the print order may not be possible, depending on the image type.
Selecting Images for Printing
Selecting images
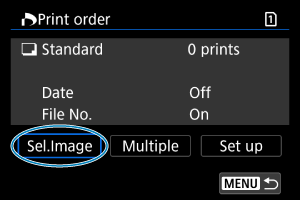
Select and specify the images individually.
Press the button to save the print order to the card.
-
Standard/Both

(1) Quantity
(2) Total images selected
Press the
button to set the print quantity for the current image to 1. By turning the
dial, you can set a print quantity of up to 99 copies.
-
Index

(3) Checkmark
(4) Index icon
Images that you add a checkmark [
] to by pressing the
button are included in index printing.
Selecting multiple images
-
Select range
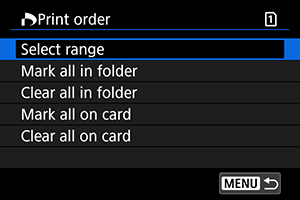
Select [Select range] in [Multiple]. Selecting the first and last images of the range marks all the images in the range with a checkmark [
], and one copy of each image will be specified for printing.
-
All images in a folder
Select [Mark all in folder] and select the folder. A print order for one copy of all the images in the folder will be specified.
If you select [Clear all in folder] and select the folder, the print order for all the images in the folder will be canceled.
-
All images on a card
If you select [Mark all on card], one copy of all the images on the card will be specified for printing.
If you select [Clear all on card], the print order will be cleared for all the images on the card.
If the search conditions are set with [: Set image search conditions] () and you select [Multiple], the display will change to [Mark all found images] and [Clear all found images].
-
All found images
If you select [Mark all found images], one copy of all the images filtered by the search conditions will be specified for printing.
If you select [Clear all found images], all the print order of the filtered images will be cleared.
Caution
- RAW/HEIF images and movies cannot be specified for printing. Note that RAW/HEIF images and movies will not be specified for printing even if you specify all images with [Multiple].