Direct Transfer
When connected to EOS Utility and while the main screen of EOS Utility is displayed, you can transfer images to a computer using the camera.
Selecting the Images to Transfer
-
Select [
 : Image transfer].
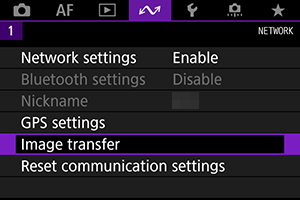
-
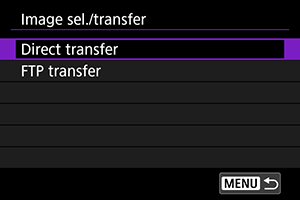
Select [Image sel./transfer].

-
Select [Direct transfer].
-
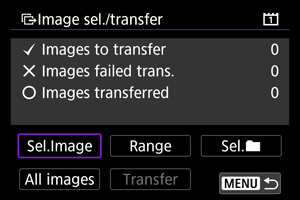
Select [Sel.Image].
-
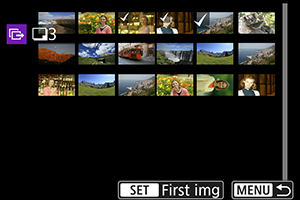
Select the images to transfer.
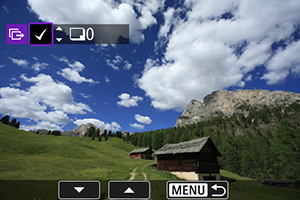
- Select the images to transfer by using
 , then press
  .
. - Display [
 ] on the screen's upper left by using , then press .
 - If you press the
 button and turn
  counterclockwise, you can select an image from a three-image display. To return to the single-image display, turn clockwise.
 - To select other images to transfer, repeat step 5.
- After selecting the images, press
 .
.
- Select the images to transfer by using
-
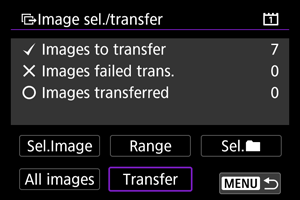
Select [Transfer].
-
Select [OK].
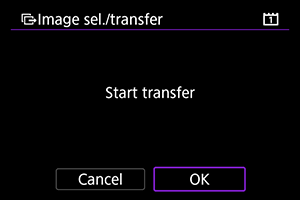
- The selected images are transferred to the computer.
Selecting Multiple Images
You can select the selection method and transfer multiple images.
-
Display the [Image sel./transfer] screen.
- Perform the actions in steps 1 to 3 of Selecting the Images to Transfer.
-
Selecting the method of selection.
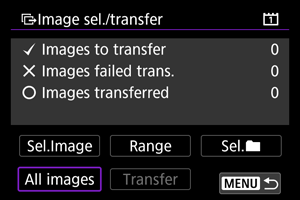
In a folder
- Select [Sel.
 ].
]. - Select the method of selection you want to use.
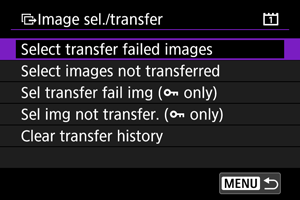
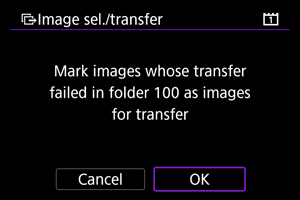
- Selecting [Select transfer failed images] selects all images in the selected folder for which transfer failed.
- Selecting [Select images not transferred] selects all unsent images in the selected folder.
- When [Sel transfer fail img (
 only)] is selected, protected images in the selected folder whose transfer has failed are selected.
 - When [Sel img not transfer. ( only)] is selected, protected images in the selected folder that have not yet been transferred are selected.
- Selecting [Clear transfer history] clears the transfer history of images in the selected folder.
- After clearing the transfer history, you can select [Select images not transferred] and transfer all images in the folder again.
- When [Sel img not transfer. ( only)] is selected after the transfer history has been cleared, all the protected images in the folder are transferred again.
- Select the folder.
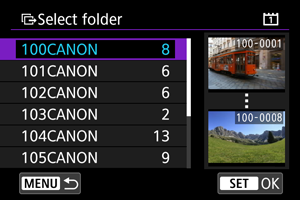
- When [OK] is selected, the selected image is transferred to the PC.
In a card
- Select [All images].
- Select the method of selection you want to use.

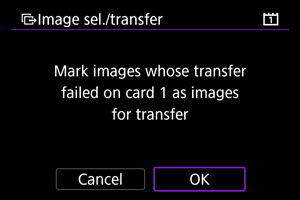
- When [Select transfer failed images] is selected, images stored on the card whose transfer has failed are selected.
- When [Select images not transferred] is selected, images stored on the card that have not yet been transferred are selected.
- When [Sel transfer fail img ( only)] is selected, protected images stored on the card whose transfer has failed are selected.
- When [Sel img not transfer. ( only)] is selected, protected images recorded on the card that have not yet been transferred are selected.
- When [Clear transfer history] is selected, the transfer history of images stored on the card is cleared.
- When [Select images not transferred] is selected after the transfer history has been cleared, all the images stored on the card are transferred again.
- When [Sel img not transfer. ( only)] is selected after the transfer history has been cleared, all the protected images stored on the card are transferred again.
- When [OK] is selected, the selected image is transferred to the PC.
Select range
- Select [Range].
- Selecting the first and last images of the range marks all the images in the range with a [], and one copy of each image will be sent.
- Once image selection is completed, press .
- When [OK] is selected, the selected image is transferred to the PC.

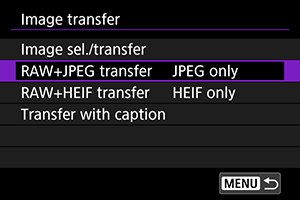
Transferring RAW+JPEG/RAW+HEIF Images
You can specify how to transfer RAW+JPEG or RAW+HEIF images.
-
Select [
: Image transfer].
-
Select the type of images to transfer.
-
RAW+JPEG transfer
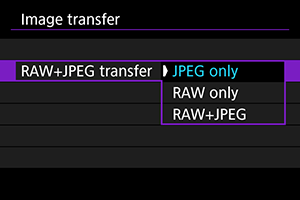
- Select [RAW+JPEG transfer], then select [JPEG only], [RAW only], or [RAW+JPEG].
-
RAW+HEIF transfer
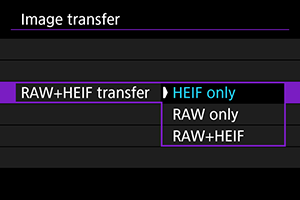
- Select [RAW+HEIF transfer], then select [HEIF only], [RAW only], or [RAW+HEIF].
-
Caution
- During image transfer, certain menu options cannot be used.