Shooting in Group-Specific Flash Modes
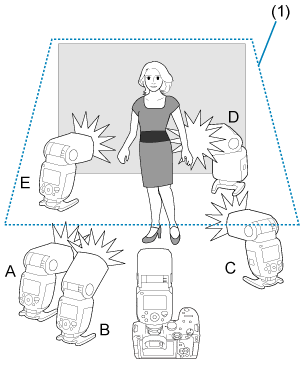
(1) Ceiling
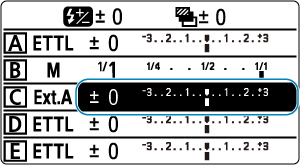
For up to five groups (A–E), you can shoot with each group set to a specific flash mode.
Available flash modes include (1) E-TTL II / E-TTL autoflash, (2) manual flash, and (3) auto external flash metering. When the flash mode is (1) or (3), exposure is controlled to result in standard exposure for the main subject as a single group.
This function is for advanced users who are very knowledgeable and experienced in lighting.
-
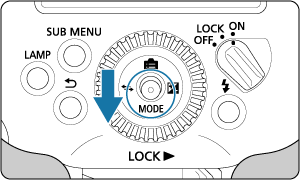
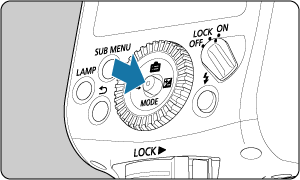
Use the joystick on the sender to select
 .
.
-
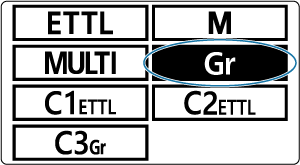
Set the flash mode to
 .
.
- Press the joystick vertically or horizontally or turn
 to select , then push the joystick straight in.
 - The receiver flash mode is set automatically during shooting, as controlled by the sender.
- Press the joystick vertically or horizontally or turn
-
Set the firing groups of the receivers.
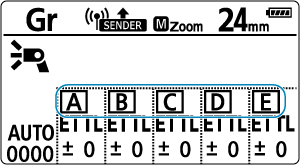
- Set a firing group (A–E) for each receiver.
-
Configure each firing group.
- On the sender, set the flash mode of each firing group.
- Push the joystick straight in.
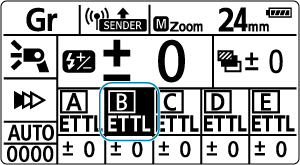
- Press the joystick vertically or horizontally or turn to select a firing group, then push the joystick straight in.
Setting the flash mode

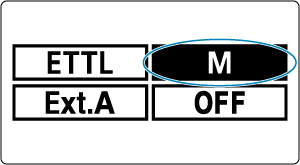
- Press the joystick vertically or horizontally or turn to select the flash mode from
 ,
,  , or
, or  .
.
Setting the flash output and flash exposure compensation amount
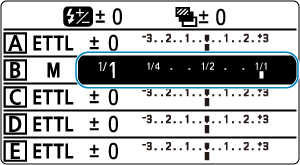
- Press the joystick vertically or horizontally or turn to select the item, then push the joystick straight in.
- Press the joystick horizontally or turn to set the flash output or flash exposure compensation amount, then push the joystick straight in.
- For , set the flash output. For or , set the flash exposure compensation amount as needed.
- Repeat step 4 to configure flash features for all firing groups.
- By setting P.Fn-03 to [1] (), you can change this setting simply by turning . To select a setting item when P.Fn-03 is set to [1], press the joystick vertically or horizontally.
-
Before shooting, confirm that flash recharging is finished.
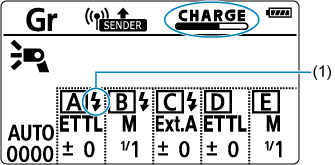
- When
 is displayed, you can determine which firing groups are not fully charged from the icons. For example, the icon shown in (1) indicates that firing group
  is fully charged.
 - is no longer displayed after all groups are fully charged.
- For other details on checking recharge status, see step 7 in Autoflash with One Receiver.
- Each receiver fires at the same time in the flash mode you have set.
- When
Caution
- For flash mode, make sure the receivers support auto external flash metering. Receivers will not fire unless it is supported.
- In or flash mode, exposure is controlled to obtain standard exposure for the main subject as if using a single group, which may cause overexposure if multiple firing groups are pointing toward the main subject.
Note
- For details on , refer to the instruction manual of Speedlites that support auto external flash metering.
- Letters of groups that fire do not need to be in consecutive alphabetical order; for example, A, C, E can be set.
- Set any group you do not wish to fire to
 when configuring flash modes in step 4. Similarly, modeling lamps of groups set to are not lit when the sender
  button is pressed.