Grundlegende Bedienung
- Kamerahaltung
- Zoom-Hebel
- Taste für Movie-Aufnahme (oben/vorne)
- Auslöser
 Hauptwahlrad
 /
/ Schnellwahlrad 1/Kreuztasten
 Schnellwahlrad 2
 Multi-Controller
 Taste für Multifunktionssperre
 Steuerungsring
 Infotaste
 /
/ 1/AF-Start-Taste
 /
/ 2/Vergrößern/Verkleinern-Taste
 /
/ 3/AE Lock-Taste
 /
/ /
/ 4/Taste Multifunktion/Bilder zum Smartphone senden
 /
/ /
/ 5/Weißabgleich/Movie-Foto-Wiedergabeauswahl-Taste
 /
/ /
/ 6/Live-Streaming/Bildsuche-Taste
 /
/ /
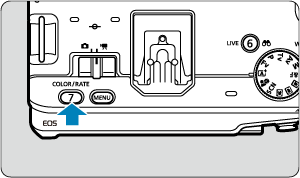
/ 7/Farbmodus/Bewertungstaste
Kamerahaltung
-
Betrachten des Bildschirms während der Aufnahme
Während der Aufnahme können Sie den Bildschirm durch Neigen anpassen. Einzelheiten finden Sie unter Verwenden des Bildschirms.
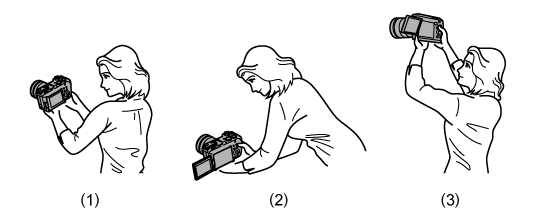
(1) Normaler Winkel
(2) Niedriger Winkel
(3) Hoher Winkel
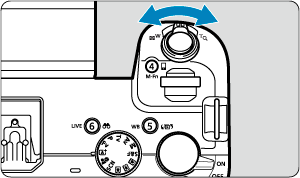
Zoom-Hebel
Sie können mit dem Zoom-Hebel zoomen, wenn Sie ein Powerzoom-Objektiv verwenden. Die folgenden Operationen sind ebenfalls verfügbar.
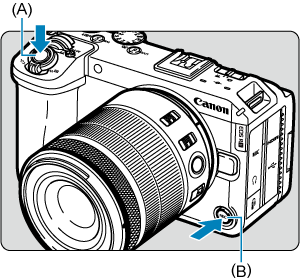
Taste für Movie-Aufnahme (oben/vorne)
Drücken Sie die Taste für Movie-Aufnahmen oben (A) oder an der Vorderseite (B), um die Aufnahme des Movies zu beginnen. Drücken Sie die Taste erneut, um die Aufnahme zu beenden.
Hinweis
- Die Movie-Aufnahme-Taste oben fungiert als Auslöser bei Fotoaufnahmen.
Auslöser
Der Auslöser hat zwei Funktionsstufen. Sie können den Auslöser halb durchdrücken, und Sie können den Auslöser vollständig durchdrücken.
Halbes Durchdrücken des Auslösers
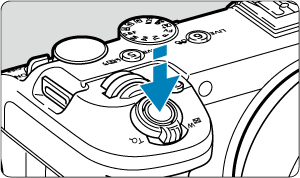
Dies aktiviert den Autofokus und das automatische Belichtungssystem, mit dem Verschlusszeit und Blendenwert eingestellt werden.
Die Belichtungsstufe (Verschlusszeit und Blendenwert) wird auf dem Bildschirm für ca. 8 Sek. (Messtimer/ ) angezeigt.
Vollständiges Durchdrücken des Auslösers
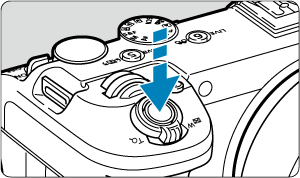
Der Verschluss wird ausgelöst, und das Bild wird aufgenommen.
-
Kameraverwacklung verhindern
Bewegungen der Kamera in freier Handhaltung während des Belichtungsmoments werden als Verwacklung bezeichnet. Solche Verwacklungen können zu unscharfen Bildern führen. Beachten Sie Folgendes, um Verwacklungen zu vermeiden:
- Halten Sie die Kamera ruhig, wie unter Kamerahaltung dargestellt.
- Drücken Sie den Auslöser zunächst für den Autofokus halb und anschließend langsam ganz durch.
Hinweis
- Wenn Sie den Auslöser ganz herunterdrücken, ohne ihn zuvor halb herunterzudrücken, oder wenn Sie den Auslöser halb herunterdrücken und ihn sofort ganz herunterdrücken, hält die Kamera vor dem Aufnehmen immer noch an.
- Selbst während der Menüanzeige oder der Bildwiedergabe können Sie zur Aufnahmebereitschaft zurückkehren, indem Sie den Auslöser halb herunterdrücken.
 Hauptwahlrad
-
(1) Drücken Sie eine Taste, und drehen Sie dann das Wahlrad
.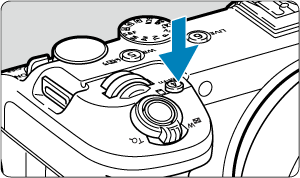
Drücken Sie eine Taste, z. B.
 und drehen Sie dann das Wahlrad .
Wenn Sie den Auslöser halb durchdrücken, wechselt die Kamera in den Aufnahmebereitschaftsmodus zurück.
- Wird für Vorgänge wie die Einstellung des Weißabgleichs, der Betriebsart oder des Bildstils verwendet.
-
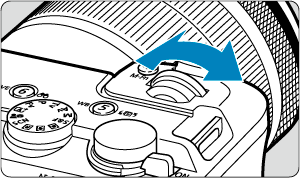
(2) Drehen Sie nur das Wahlrad
.Beobachten Sie den Bildschirm, während Sie das
-Wahlrad drehen.- Mit diesem Wahlrad können Sie Verschlusszeit, Blendenwert usw. einstellen.
 /
/ Schnellwahlrad 1/Kreuztasten
-
(1) Drücken Sie eine Taste, und drehen Sie dann das Wahlrad
.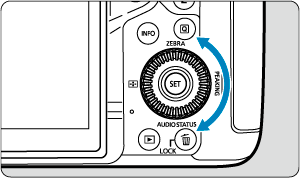
Drücken Sie eine Taste, z. B.
und drehen Sie dann das Wahlrad .Wenn Sie den Auslöser halb durchdrücken, wechselt die Kamera in den Aufnahmebereitschaftsmodus zurück.
- Dient zur Einstellung der Messmethode, des AF-Betriebs, der ISO-Empfindlichkeit oder des AF-Bereichs.
-
(2) Drehen Sie nur das Wahlrad
.Beobachten Sie den Bildschirm, während Sie das
-Wahlrad drehen.- Wird für Vorgänge wie das Einstellen des Belichtungskorrekturwerts und des Blendenwerts für manuelle Belichtungen verwendet.
-
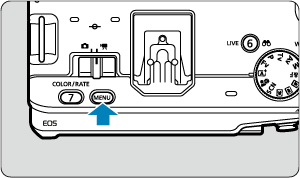
(3) Nachdem Sie eine Taste gedrückt haben, drücken Sie die Tasten


 .
.
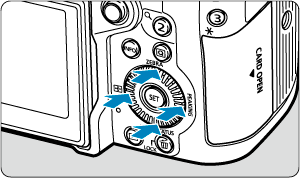
Drücken Sie die
 - oder
  -Taste und dann die - oder -Taste, um Menü- oder Schnelleinstellungen vorzunehmen.
 Schnellwahlrad 2
-
(1) Drücken Sie eine Taste, und drehen Sie dann das Wahlrad
.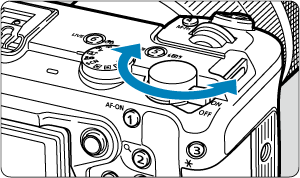
Drücken Sie eine Taste, z. B.
und drehen Sie dann das Wahlrad .Wenn Sie den Auslöser halb durchdrücken, wechselt die Kamera in den Aufnahmebereitschaftsmodus zurück.
- Wird für Vorgänge wie das Wechseln zwischen Hauptregisterkarten auf dem Menübildschirm verwendet.
-
(2) Drehen Sie nur das Wahlrad
.Beobachten Sie den Bildschirm, während Sie das
-Wahlrad drehen.- Wird für Vorgänge wie z. B. das Einstellen der ISO-Empfindlichkeit verwendet.
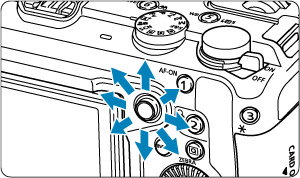
 Multi-Controller
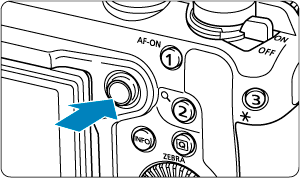
ist eine acht-direktionale Richtungstaste mit einer zentralen Taste.
Um ihn zu bedienen, legen Sie den Daumenballen in die Mitte und neigen den Multi-Controller in eine beliebige Richtung. Beachten Sie, dass die Funktion möglicherweise nicht ordnungsgemäß ausgeführt wird, wenn Sie die Taste von der Seite drücken.
-
Beispiele für die Verwendung des Multi-Controllers
- AF-Messfeld-/Vergrößerungsrahmenbewegung bei Fotoaufnahmen oder Movie-Aufnahmen
- Weißabgleich-Korrektur
- Bewegung der Position des Vergrößerungsbereichs während der Wiedergabe
- Schnelleinstellung
- Auswählen oder Einstellen von Menüelementen
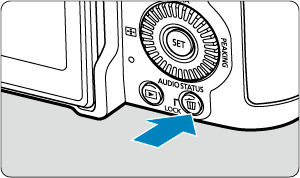
 Taste für Multifunktionssperre
Wenn [ : Multifunktionssperre] konfiguriert ist (), können Sie die Taste drücken, um zu verhindern, dass die Einstellungen geändert werden, indem Sie versehentlich das Hauptwahlrad, das Schnellwahlrad, den Multi-Controller, den Steuerungsring oder das Touchscreen-Bedienfeld berühren.
 Steuerungsring
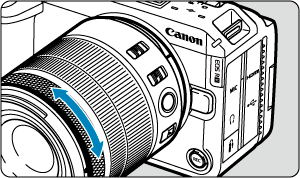
Standardmäßig kann die Belichtungskorrektur in Kreativ-Programmen eingestellt werden, indem der Steuerungsring der RF Objektive oder Bajonettadapter gedreht wird, während der Auslöser halb durchgedrückt wird. Andernfalls können Sie dem Steuerungsring eine andere Funktion zuweisen, indem Sie die Bedienvorgänge in [] in [: Wahlräd./St.-ring anpassen] () konfigurieren.
 Infotaste
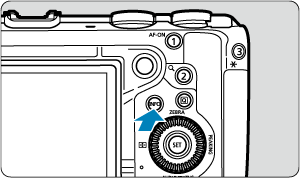
Die angezeigten Informationen ändern sich bei jedem Drücken der Taste .
 /
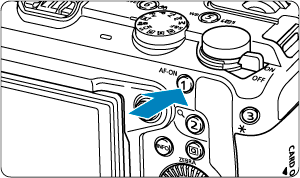
/ 1/AF-Start-Taste
Drücken Sie diese Taste während der Movie-Aufnahme, um den Autofokus in den Kreativprogramme-Filmmodi zu aktivieren.
Bei Fotoaufnahmen in Kreativ-Programmen entspricht das Drücken dieser Taste dem halben Drücken des Auslösers.
 /
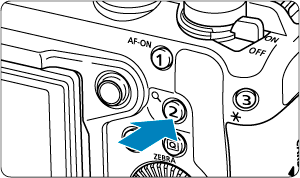
/ 2/Vergrößern/Verkleinern-Taste
Während der Aufnahme können können Sie den Fokus prüfen, indem Sie die Anzeige in etwa um den Faktor 5 oder 10 vergrößern. Während der Wiedergabe können Sie die Anzeige Ihrer aufgenommenen Bilder vergrößern.
 /
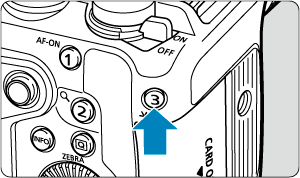
/ 3/AE Lock-Taste
Sie können die Belichtung (AE-Speicherung) während der Aufnahme speichern.
 //
// 4/Taste Multifunktion/Bilder zum Smartphone senden
Drücken Sie die Taste während der Aufnahm, um die Einstellungen anzuzeigen, die mit den Wahlrädern vorgenommen werden können. Drücken Sie diese Taste während der Wiedergabe, um den Einstellungsbildschirm für das Senden von Bildern an ein Smartphone aufzurufen ().
Einstellungen, die Sie in Verbindung mit Wahlrädern konfigurieren können
- Weißabgleich ()
- Betriebsart* ()
- Farbmodus ()
- Messmethode* ()
- AF-Betrieb* ()
- ISO-Empfindlichkeit* ()
- AF-Bereich ()
Nur verfügbar bei Fotoaufnahmen. Die ISO-Empfindlichkeit kann allerdings im Movie-Aufnahme mit manueller Belichtung-Modus eingestellt werden.
Zur Verwendung mit Wahlrädern
- Drücken Sie die -Taste, um die Einstellungen anzuzeigen, die Sie mit den Wahlrädern vornehmen können (
 ). Drücken Sie nochmals und wiederholt die -Taste (oder drehen Sie das -Wahlrad), um eine zu konfigurierende Einstellung auszuwählen.
 - Drehen Sie das -Wahlrad, um die obere Reihe der Einstellungselemente anzupassen.
- Drehen Sie das -Wahlrad, um die untere Reihe der Einstellungselemente anzupassen.
Vorsicht
- Erweiterte Weißabgleich-Einstellungen wie die Farbtemperatur können auf diese Weise nicht konfiguriert werden.
Hinweis
- Nur der aktuelle Farbmodus kann auif diese Weise angepasst werden.
- Zum Einstellen des AF-Bereichs können Sie auch die Taste
 und dann die Taste drücken.
 /
/ /
/ 5/Weißabgleich/Movie-Foto-Wiedergabeauswahl-Taste
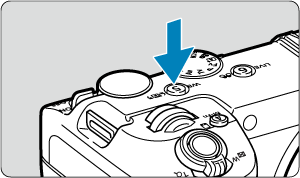
Drücken Sie die Taste, um den Bildschirm zur Auswahl des Weißabgleichs anzuzeigen (). Drücken Sie diese Taste während der Wiedergabe, um zwischen der Wiedergabe von Movies und Fotoaufnahmen zu wechseln.
 /
/ /
/ 6/Live-Streaming/Bildsuche-Taste
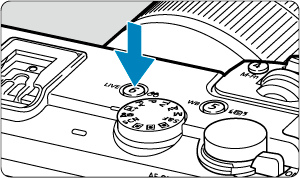
Drücken Sie diese Taste während der Movie-Aufnahme, um den Einstellungsbildschirm für das Streaming aufzurufen (). Drücken Sie diese Taste während der Wiedergabe, um Bilder anzuzeigen, die anhand der aktuellen Suchbedingungen gefunden wurden.
 /
/ /
/ 7/Farbmodus/Bewertungstaste
Drücken Sie die Taste, um auf den Bildschirm zur Auswahl des Farbmodus zuzugreifen (). Drücken Sie die Taste während der Wiedergabe, um das Bild zu bewerten.